

What is AWS in simple terms?
Amazon Web Services is a cloud computing platform that provides customers with a wide array of cloud services. We can define AWS (Amazon Web Services) as a secured cloud services platform that offers compute power, database storage, content delivery, and various other functionalities.
What is Terraform?
Terraform is a tool to create and manage your whole infrastructure like your web app, web server, etc.
It is used for building, changing, and versioning infrastructure safely and efficiently. Terraform can manage existing and popular service providers as well as custom in-house solutions.
Configuration files describe to Terraform the components needed to run a single application or your entire data center. Terraform generates an execution plan describing what it will do to reach the desired state, and then executes it to build the described infrastructure. As the configuration changes, Terraform is able to determine what changed and create incremental execution plans which can be applied.
The infrastructure Terraform can manage includes low-level components such as compute instances, storage, and networking, as well as high-level components such as DNS entries, SaaS features, etc.
Infrastructure as Code
Infrastructure is described using a high-level configuration syntax. This allows a blueprint of your data center to be versioned and treated as you would any other code. Additionally, infrastructure can be shared and re-used.
In simple terms, terraform gives us the power of Infrastructure as code means our whole setup like web server, web app, etc... we can create it by just a simple descriptive code.
What is AWS EC2?
Amazon Elastic Compute Cloud (EC2) provides scalable computing capacity in the AWS cloud. Using EC2 eliminates your need to invest in hardware up front, so you can develop and deploy applications faster. You can use Amazon EC2 to launch as many or as few virtual servers as you need, configure security and networking, and manage storage.
What is AWS EBS?
Amazon Elastic Block Store (EBS) is an easy-to-use, high-performance block storage service designed for use with EC2 for both throughput and transaction-intensive workloads at any scale. A broad range of workloads, such as relational and non-relational databases, enterprise applications, containerized applications, big data analytics engines are widely deployed on EBS.
What is AWS S3?
Amazon S3 is an object storage service that offers industry-leading scalability, data availability, security, and performance. It has a range of use cases, such as websites, mobile applications, backup and restore, archive, enterprise applications, IoT devices, and big data analytics. S3 provides easy-to-use management features. Amazon S3 is designed for 99.999999999% (11 9’s) of durability.
What is AWS CloudFront?
Amazon CloudFront is a fast content delivery network (CDN) service that securely delivers data, videos, applications, and APIs to customers globally with low latency, high transfer speeds, all within a developer-friendly environment.
Task: To create/launch Application using Terraform.
Create the key and security group which allows port 80.
Launch EC2 instance.
In this EC2 Instance use the key and security group which we have created in step 1.
Launch one Volume (EBS) and mount that volume into /var/www/html
Developer has uploaded the code into the GitHub repo also the repo has some images.
Copy the GitHub repo code into /var/www/html
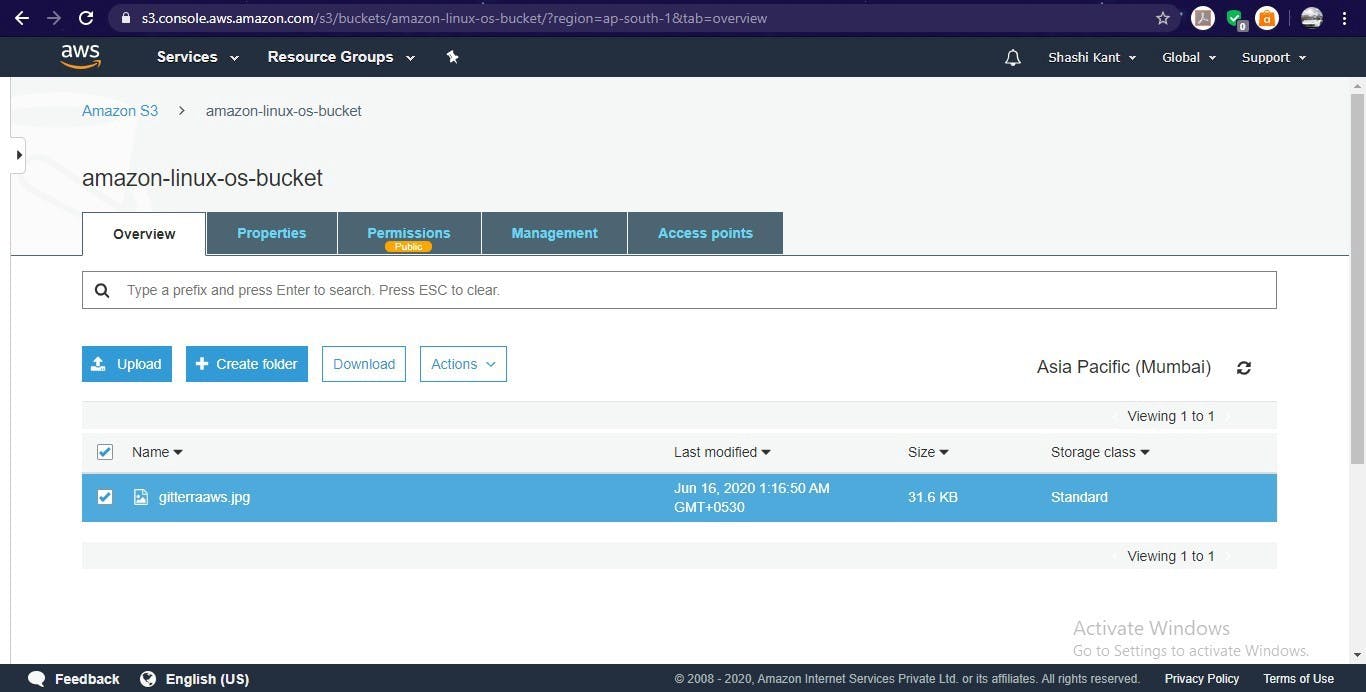
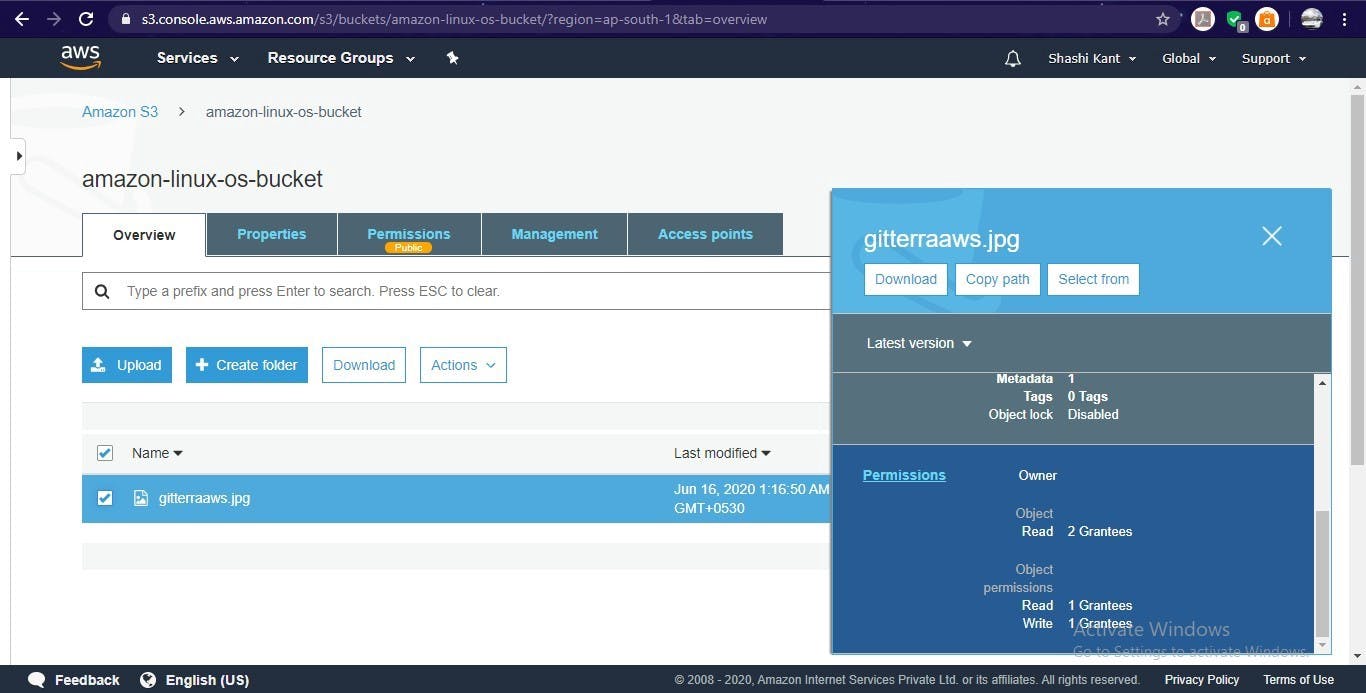
Create an S3 bucket, and copy/deploy the images from the GitHub repo into the s3 bucket and change the permission to public readable.
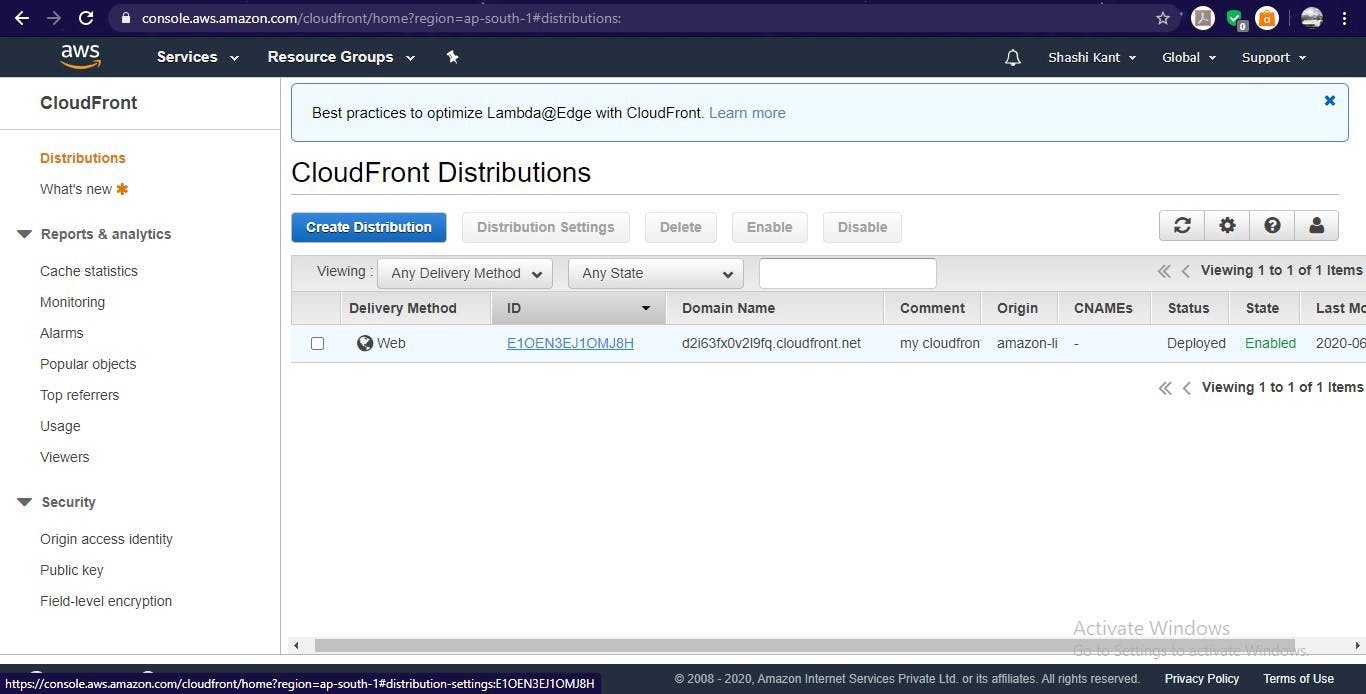
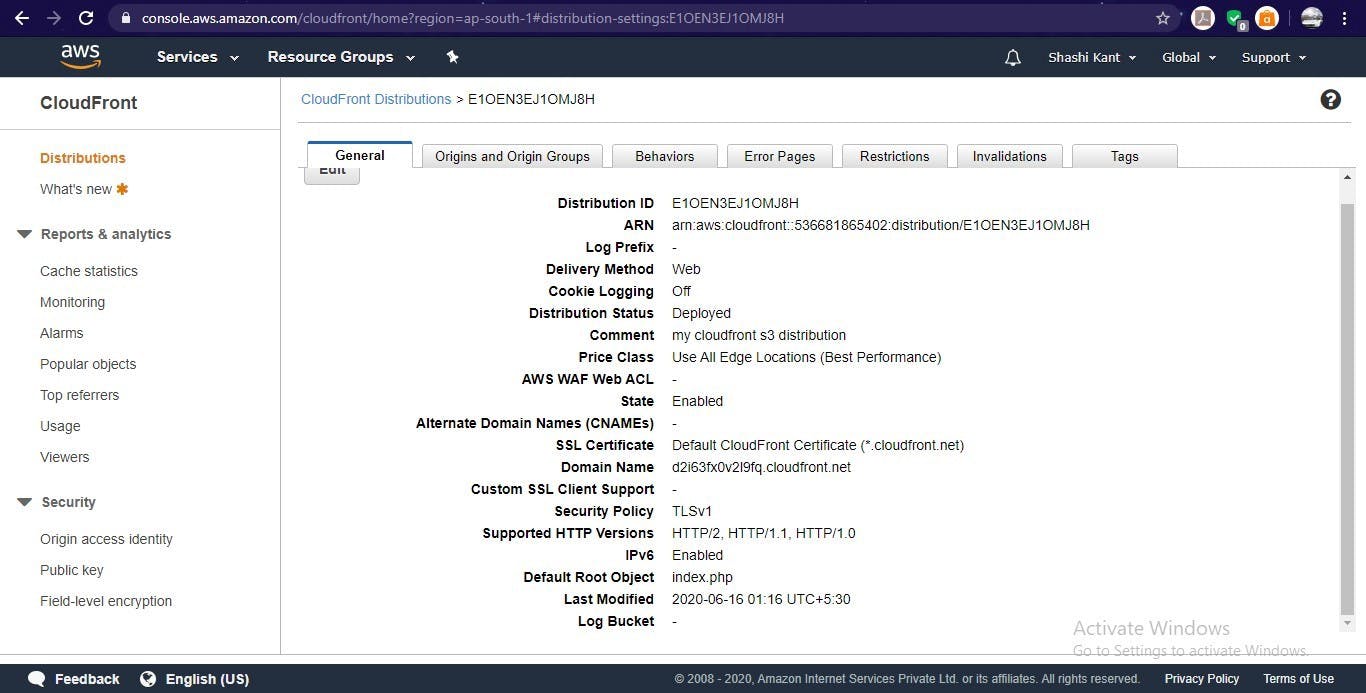
Create a Cloudfront using s3 bucket(which contains images) and use the Cloudfront URL to update in code in /var/www/html
Prerequisites Before getting started.
- AWS account
- Terraform Installed
- Set up the path for Terraform in system environment variables
Lets Get Started
Install and Configure AWS CLI
Download and install the latest version of AWS CLI.
aws --version
If the above command runs successfully, then AWS CLI is installed successfully.
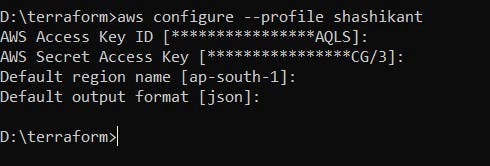
Configure AWS CLI -
So, for using AWS services in CLI first we’ve to login (configure) into AWS CLI, and for that, we need to have an IAM account in AWS Account.
It asks for the Access key, Secret access key, Region name, and Output format (default is JSON) to configure.
aws configure
Set Provider
In a new workspace create a .tf file and set provider details.
provider "aws" {
  region  = "ap-south-1"
  profile = "shashikant"
}
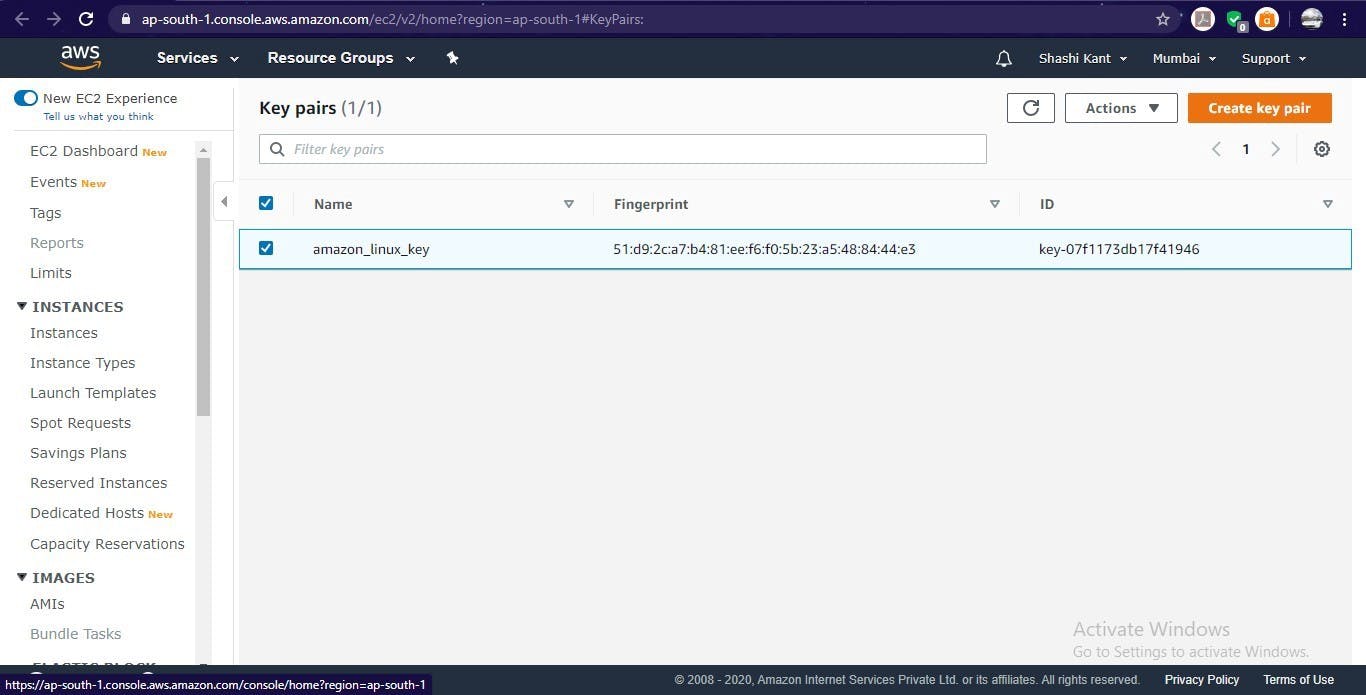
Create key pair for Instance
Create a key pair to login into Instance.
resource "tls_private_key" "amazon_linux_key_private" {
  algorithm   = "RSA"
  rsa_bits = 2048
}

resource "aws_key_pair" "amazon_linux_key" {

depends_on = [
    tls_private_key.amazon_linux_key_private,
  ]

  key_name   = "amazon_linux_key"
  public_key = tls_private_key.amazon_linux_key_private.public_key_openssh
}
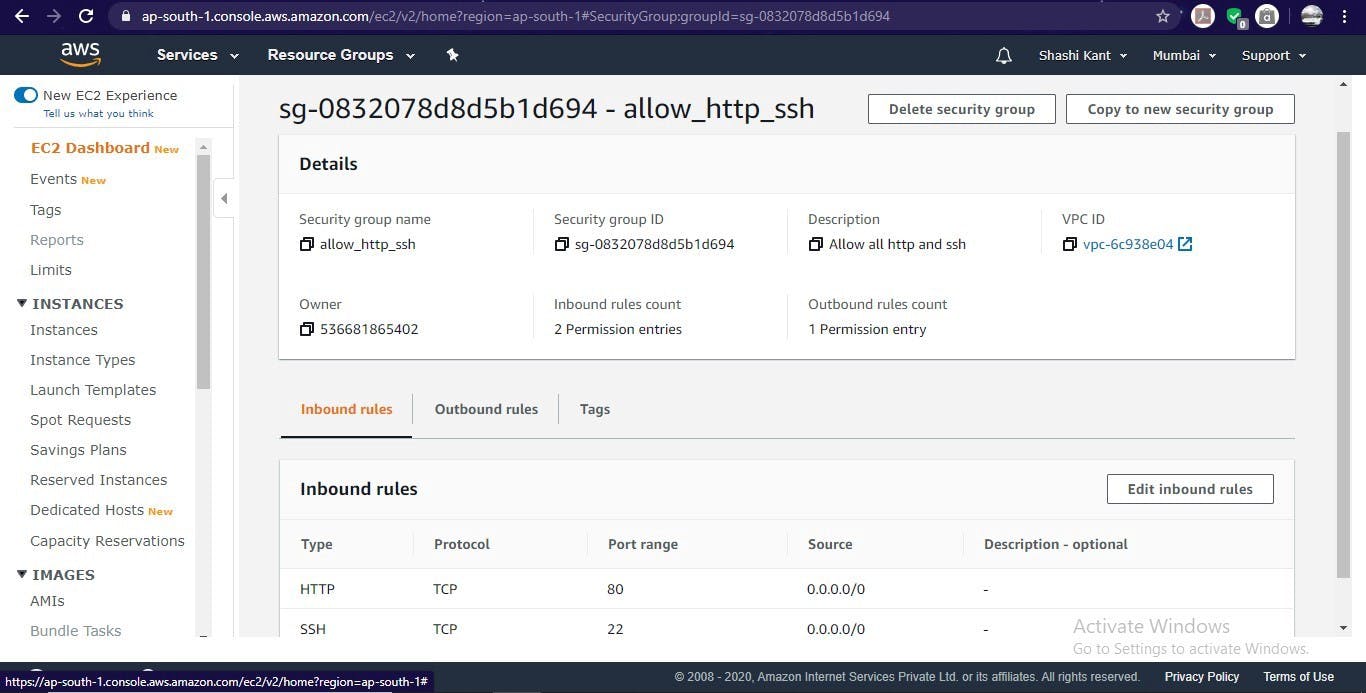
Create a security group
Create a security group that allows port numbers 22 and 80.
resource "aws_security_group" "allow_http_ssh" {
  name        = "allow_http_ssh"
  vpc_id      = "vpc-6c938e04"
  description = "Allow all http and ssh"

  ingress {
    from_port   = 22
    to_port     = 22
    protocol    = "tcp"
    cidr_blocks = ["0.0.0.0/0"]
  }

  ingress {
    from_port   = 80
    to_port     = 80
    protocol    = "tcp"
    cidr_blocks = ["0.0.0.0/0"]
  }

  egress {
    from_port   = 0
    to_port     = 0
    protocol    = "-1"
    cidr_blocks = ["0.0.0.0/0"]
  }

  tags = {
    Name = "allow_http_ssh"
  }
}
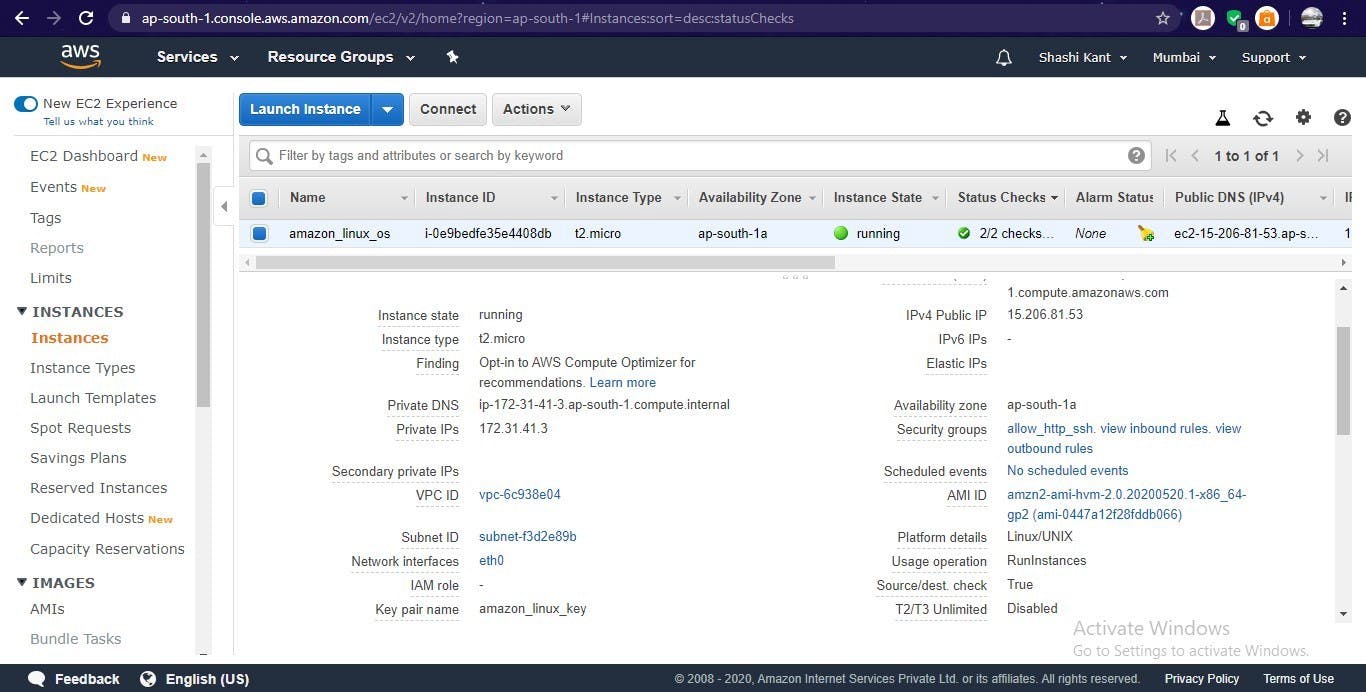
Launch AWS Instance
Launch an instance to do further things. and use the same key pair and security group created above.
resource "aws_instance" "amazon_linux_os" {
  ami           = "ami-0447a12f28fddb066"
  instance_type = "t2.micro"

  key_name = "amazon_linux_key"

  security_groups = [ "${aws_security_group.allow_http_ssh.name}" ]

  tags = {
    Name = "amazon_linux_os"
  }
}
Connect to Instance
To install HTTPD, PHP, Git software, we need login into Instance.
resource "null_resource" "connection_after_instance_launch"  {

    depends_on = [
        aws_instance.amazon_linux_os,
    ]

    connection {
        type        = "ssh"
        user        = "ec2-user"
        private_key = tls_private_key.amazon_linux_key_private.private_key_pem
        host        = aws_instance.amazon_linux_os.public_ip
    }

    provisioner "remote-exec" {
        inline = [
            "sudo yum install httpd  php git -y",
            "sudo systemctl start httpd",
            "sudo systemctl enable httpd",
        ]
    }
}
Create EBS volume
Create a EBS volume to store data permanently.
resource "aws_ebs_volume" "ebs_amazon_linux_os" {

depends_on = [
    aws_instance.amazon_linux_os, null_resource.connection_after_instance_launch,
  ]

  availability_zone = aws_instance.amazon_linux_os.availability_zone
  size              = 1

  tags = {
    Name = "pd_amazon_linux_os_server"
  }
}
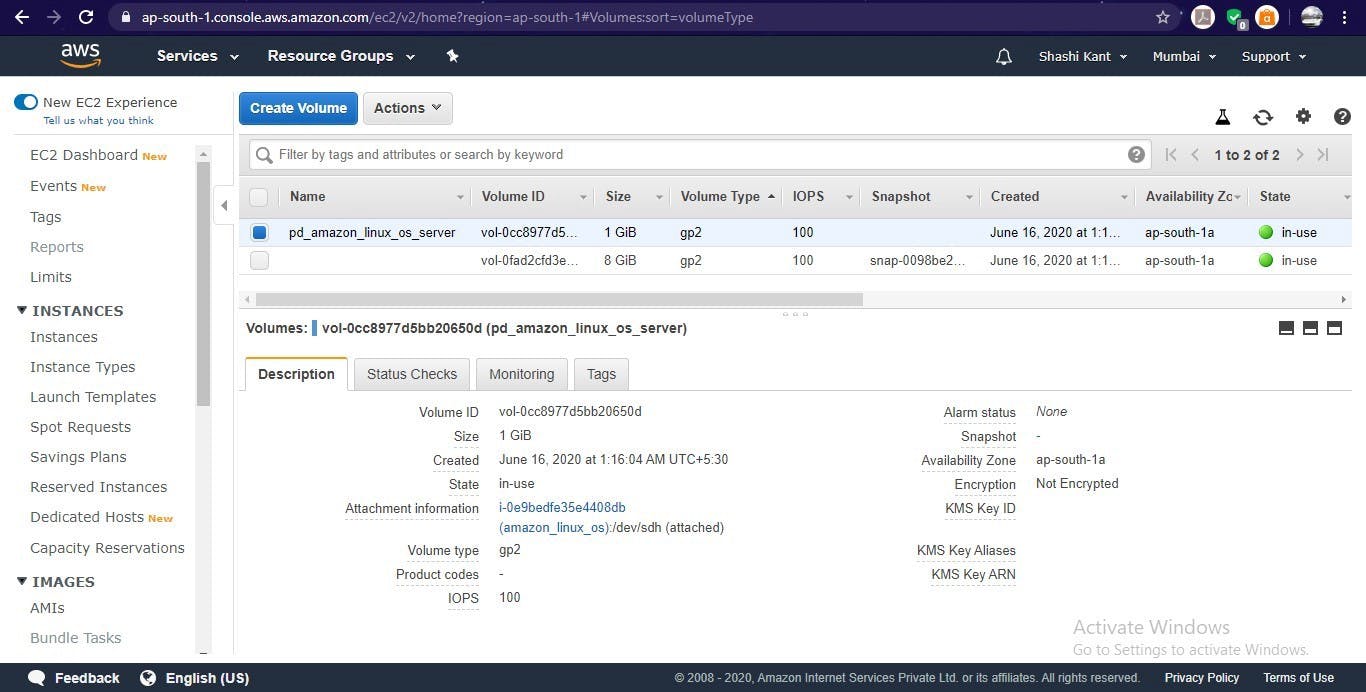
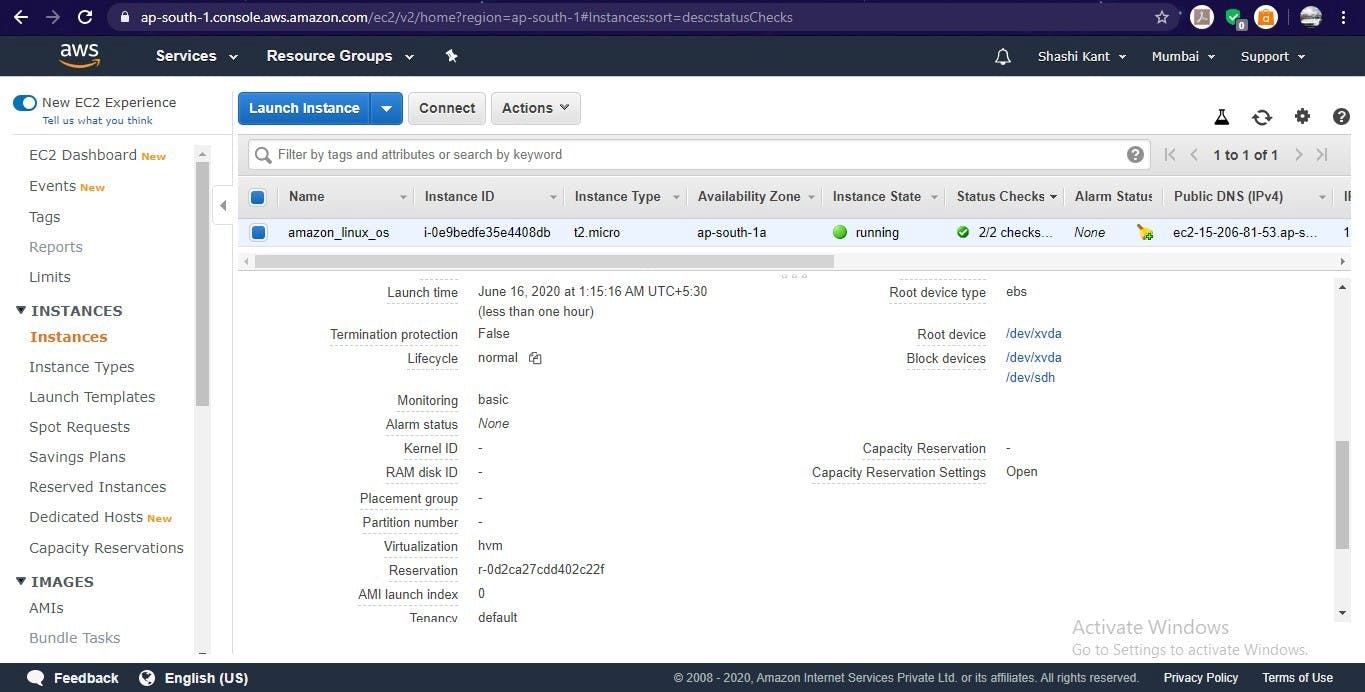
Attach EBS volume to Instance
Attach EBS volume to EC2 instance.
resource "aws_volume_attachment" "ebs_amazon_linux_os_attach" {

depends_on = [
    aws_instance.amazon_linux_os, aws_ebs_volume.ebs_amazon_linux_os,
  ]

  device_name = "/dev/sdh"
  volume_id   = aws_ebs_volume.ebs_amazon_linux_os.id
  instance_id = aws_instance.amazon_linux_os.id
  force_detach = true

}
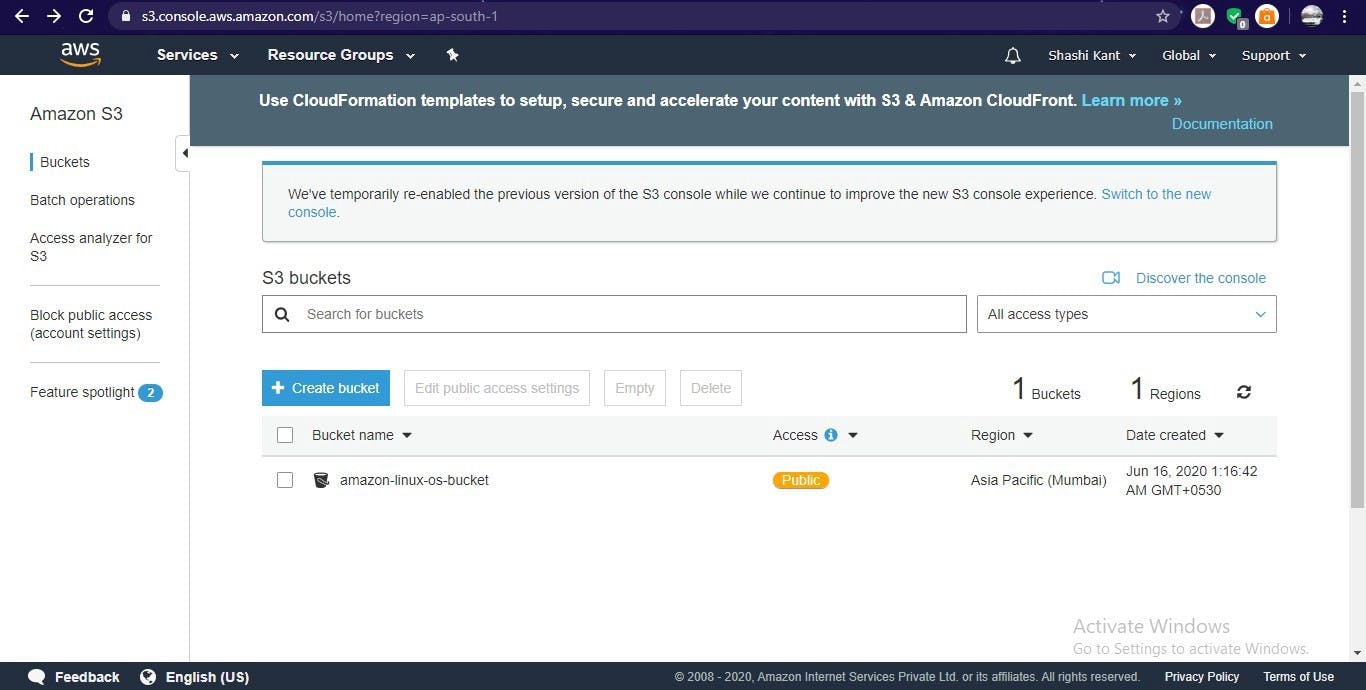
Create S3 bucket
Create an S3 bucket and give it permission public read.
resource "aws_s3_bucket" "amazon_linux_os_bucket" {

depends_on = [
    aws_volume_attachment.ebs_amazon_linux_os_attach,
  ]

  bucket = "amazon-linux-os-bucket"
  acl    = "public-read"
  force_destroy = true
  tags = {
    Name = "amazon_linux_os_s3_bucket"
  }
}

   locals {
    s3_origin_id = "myorigin"
}

resource "aws_s3_bucket_public_access_block" "make_item_public" {
  bucket = aws_s3_bucket.amazon_linux_os_bucket.id

  block_public_acls   = false
  block_public_policy = false
}
Put an Object in the S3 bucket
Put some objects / Images in the same S3 bucket created above to show on the Web Page.
resource "aws_s3_bucket_object" "amazon_linux_os_bucket_object" {

depends_on = [
    aws_s3_bucket.amazon_linux_os_bucket,
  ]

  bucket = aws_s3_bucket.amazon_linux_os_bucket.id
  key    = "gitterraaws.jpg"
  source = "D:/terraform/gitterraaws.jpg"
  etag   = "D:/terraform/gitterraaws.jpg"
  force_destroy = true
  acl    = "public-read"
}
Create CloudFront distribution
Create CloudFront distribution of S3 bucket.
resource "aws_cloudfront_origin_access_identity" "origin_access_identity" {
  comment = "origin access identity"
}

resource "aws_cloudfront_distribution" "amazon_linux_os_cloudfront" {

  depends_on = [
      aws_s3_bucket_object.amazon_linux_os_bucket_object,
  ]

  origin {
    domain_name = aws_s3_bucket.amazon_linux_os_bucket.bucket_regional_domain_name
    origin_id   = local.s3_origin_id

    s3_origin_config {
        origin_access_identity = aws_cloudfront_origin_access_identity.origin_access_identity.cloudfront_access_identity_path
    }
  }

    enabled             = true
    is_ipv6_enabled     = true
      comment             = "my cloudfront s3 distribution"
      default_root_object = "index.php"

  default_cache_behavior {

    allowed_methods  = ["DELETE", "GET", "HEAD", "OPTIONS", "PATCH", "POST", "PUT"]

    cached_methods   = ["GET", "HEAD"]
    target_origin_id = local.s3_origin_id

    forwarded_values {
      query_string = false
      headers      = ["Origin"]

      cookies {
        forward = "none"
      }
    }

   viewer_protocol_policy = "allow-all"
    min_ttl                = 0
    default_ttl            = 3600
    max_ttl                = 86400
  }

   restrictions {
    geo_restriction {
      restriction_type = "none"
    }
  }

  viewer_certificate {
    cloudfront_default_certificate = true
  }
}
Connect to Instance
Again login into the Instance, to format and mount new EBS volume, then put GitHub code and CloudFront distribution domain name in /var/www/html directory. In last again start the HTTPD service and enable it.
Do this process in last because it depends on many other previous resources.
resource "null_resource" "connection"  {

 depends_on = [
    aws_s3_bucket_object.amazon_linux_os_bucket_object,aws_cloudfront_origin_access_identity.origin_access_identity,
        aws_cloudfront_distribution.amazon_linux_os_cloudfront,
  ]

  connection {
    type     = "ssh"
    user     = "ec2-user"

    private_key = tls_private_key.amazon_linux_key_private.private_key_pem

    host     = aws_instance.amazon_linux_os.public_ip
  }

provisioner "remote-exec" {
    inline = [
      "sudo mkfs.ext4  /dev/xvdh",
      "sudo mount  /dev/xvdh  /var/www/html",
      "sudo rm -rf /var/www/html/*",
      "sudo git clone https://github.com/Shashikant17/cloudfront.git /var/www/html/",
      "sudo su << EOF",
            "echo \"${aws_cloudfront_distribution.amazon_linux_os_cloudfront.domain_name}\" >> /var/www/html/myimg.txt",
            "EOF",
      "sudo systemctl stop httpd",
      "sudo systemctl start httpd",
      "sudo systemctl enable httpd"
    ]
  }
}
Launch Webbrowser
Launch a web browser to see the output of code.
resource "null_resource" "chrome_output"  {

depends_on = [
    aws_cloudfront_distribution.amazon_linux_os_cloudfront,null_resource.connection,
  ]

    provisioner "local-exec" {
        command = "start chrome  ${aws_instance.amazon_linux_os.public_ip}"
    }

}
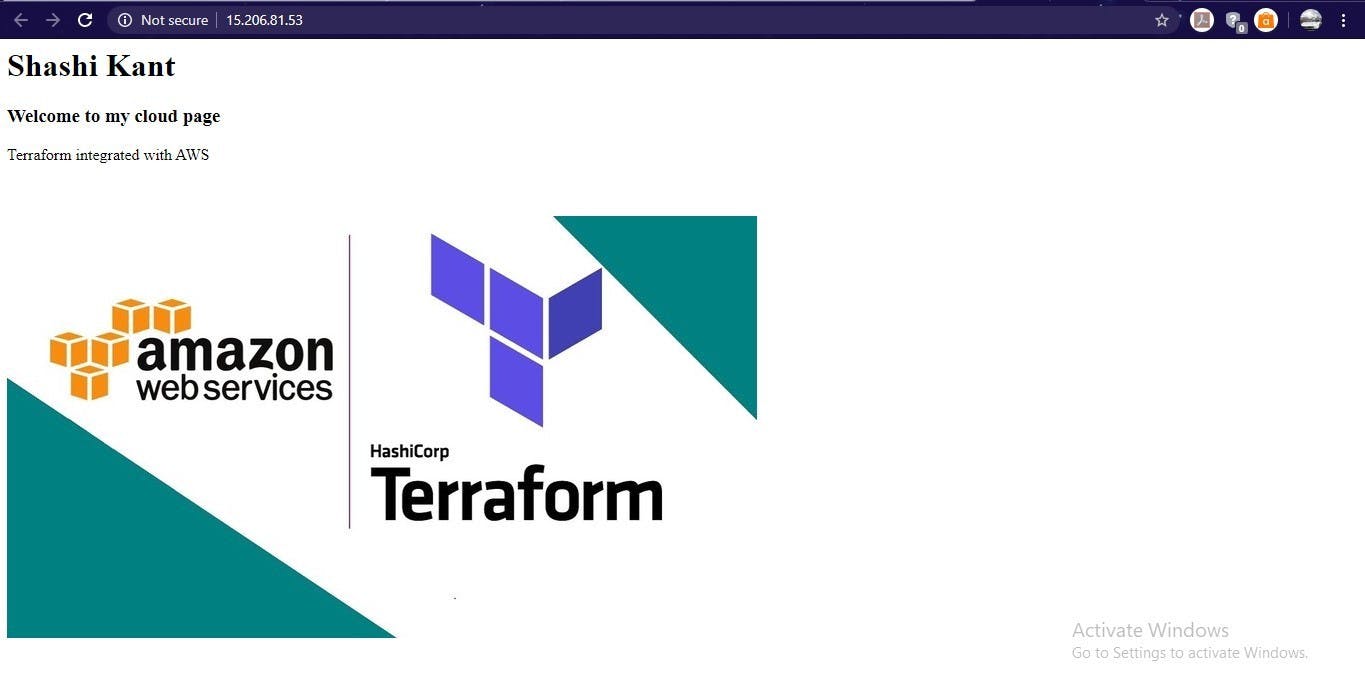
Here, is our web page.
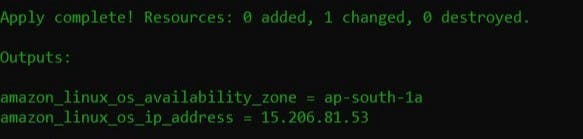
See IP address and Availability zone on AWS CLI
To see the IP address and availability zone of your EC2 instance on CLI use the output keyword and give value whatever information you want to see on AWS CLI
output "amazon_linux_os_ip_address" {
    value = aws_instance.amazon_linux_os.public_ip
}

output "amazon_linux_os_availability_zone" {
    value = aws_instance.amazon_linux_os.availability_zone

}
Very Important Instructions
For the first time running Terraform code on AWS CLI, use terraform init to install the plugins.
Do this process only once.
terraform init
To check the syntax of code run terraform validate. If got some error, then check the syntax of the code, and try again until success comes.
terraform validate

To apply Terraform code to create infrastructure, use
terraform apply
To destroy all the infrastructure created by your Terraform code, use
terraform destroy
To see my terraform code - GitHub Repo
That’s All, Keep Learning.
! THANK YOU For Reading !