


Deploy Web Server on AWS EC2 using Ansible !
Steps -
Provision EC2 instance through ansible.
Retrieve the IP Address of the instance using the dynamic inventory concept.
Configure the webserver through ansible!
Create a role for the webserver to customize the Instance and deploy the webpage to the root directory.
Prerequisites
Configure Ansible on the controller node.
AWS account with IAM role with its access key and secret key.
Basic knowledge of Ansible.
So, Lets Get Started
we're going to run all the tasks on localhost controller node, so there is no need to configure static inventory of controller node.
Configure ansible.cfg File
First, we have to configure our ansible.cfg file in the /etc/ansible/ directory.
[defaults]
inventory = /root/ansible/inventory/myhosts.txt
host_key_checking = False
remote_user = ec2-user
ask_pass = false
private_key_file = /root/mykey.pem
roles_path = /root/ansible/roles/

[privilege_escalation]
become = true
become_method = sudo
become_user = root
become_ask_pass = false
In this file, Add your inventory location, host_key_checking, ask_pass
Add remote_user - here, ec2-user because in AWS instances by default root login is not enabled.
To configure Instance ansible have to login into ec2-instance so it also needs ssh key to login into it. that is why in private_key_file pass your ssh key location (ssh key should be in .pem format).
And in roles_path - pass the location where your Ansible roles are present.
Ansible need root power to configure ec2-instance (Installing the software, starting the services, etc.) so, here we are using sudo method to give ansible, power of root user.
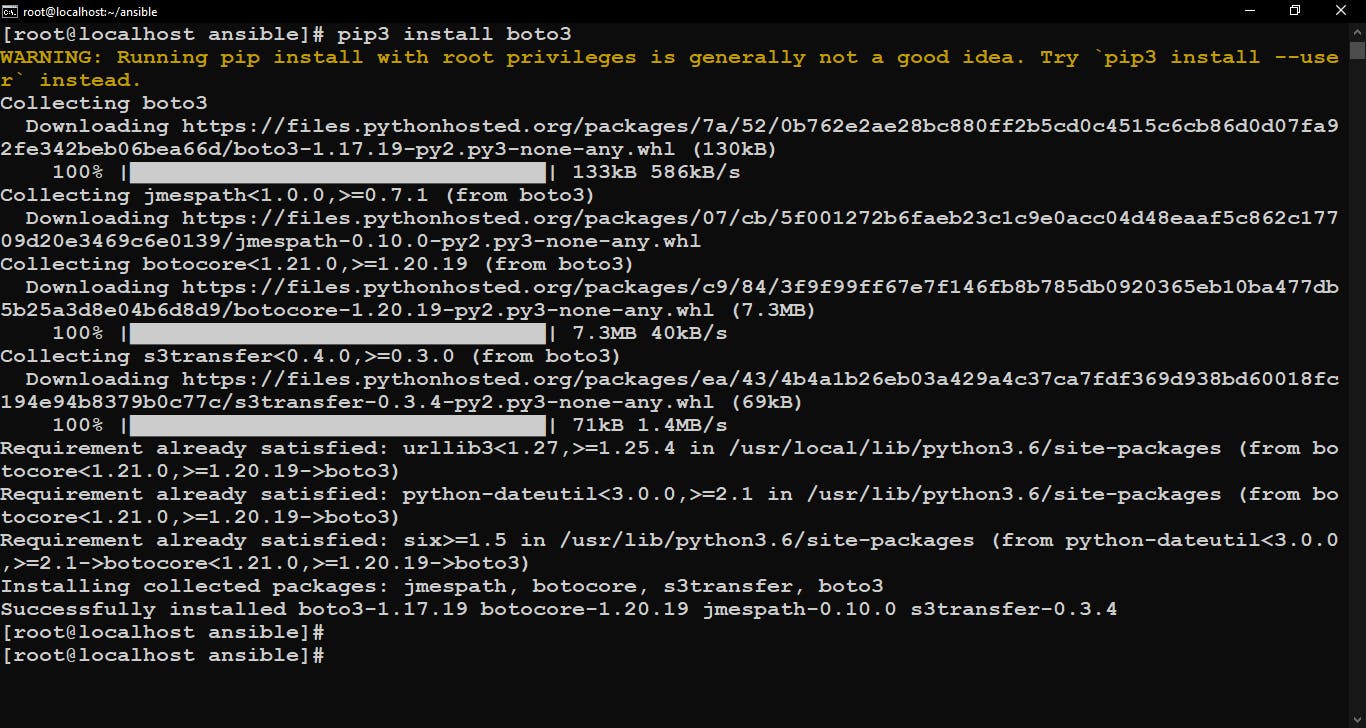
Install boto Python Library
To connect with AWS cloud Ansible needs boto python library installed on Host (Here host is localhost) so, we need to install the boto library on our controller node.
Installing the boto3 library of python.
pip3 install boto3
Before writing the playbook we have to create Ansible Vault to store AWS IAM user credentials.
Ansible Vault
In this vault, we can write our ID and Password to hide them from the world. and we lock this file with some password so that our credentials will be secure.
To create an Ansible vault run the below command.
ansible-vault create <name_of_vault.yml>
ansible-vault create vault.yml
After running this command, put a password to lock your ansible vault file. And it will open a text editor for you. Inside this file write your access key and secret key of AWS user.
accesskey: <your aws access key>
secretkey: <your aws secret key>
save this file. your credential will be secure.
Ansible Playbook
Now, its time to write an Ansible playbook to create EC2 Instance for Launching Apache Webserver
Create a workspace in the controller node and start writing the playbook and the extension should be .yml or .yaml of the file because we write the playbook in YAML format.
- hosts: localhost
  vars_files:
          - vault.yml
  tasks:
   - name: "launching ec2 instance on AWS"
     ec2:
       key_name: "mykey"
       instance_type: t2.micro
       image: "ami-0a9d27a9f4f5c0efc"
       wait: yes
       count: 1
       instance_tags:
                Name: "myAnsibleOS"
       state: present
       region: "ap-south-1"
       group_id: "sg-0115c41a0b3c39bda"
       aws_access_key: "{{ accesskey }}"
       aws_secret_key: "{{ secretkey }}"
     register: ec2
we’re running this part of the playbook on localhost, that’s why we write localhost in the hosts keyword.
then we pass our vault file name in vars_files, so, when ansible go to AWS to launch EC2 instance then it needs those credentials(access key and secret key)
In tasks, I use the ec2 module to launch the ec2 instance, here we have to write.
key_name - so that Ansible can log in to the instance and configure it as a web server.
instance_type - Pass instance type whichever you want.
image (AMI) - Here I’m using RedHat AMI. you can use another image also.
wait - It is a very important keyword here because I want when this playbook run, till the time my instance launched this play will wait then it will go to the next play. Because my other plays are dependent on this Instance launch.
count - No. of instances you want to launch.
instance_tags - Give some tags to your Instance so that it will be easily recognizable.
state - Set instance state. here I put present means I have to launch it.
region - Select the region where you want to launch your instance.
group_id - Give some security group-id here. and in the security group, inbound rules SSH and HTTP port no. 22 and 80 respectively should be allowed.
aws_access_key and aws_secret_key - Write the variable name which is created in the vault file.
And all the details of Instance are stored in ec2 variable through register keyword.
- name: "Add new Instance to Host group"
  add_host:
     hostname: "{{ item.public_ip }}"
     groupname: webserver
  loop: "{{ ec2.instances }}"

- name: "Wait for SSH in Instance"
  wait_for:
         host: "{{ item.public_dns_name }}"
         port: 22
         state: started
  loop: "{{ ec2.instances }}"
Now after launching the instance we have to add the public IP of the instance in the dynamic inventory of Ansible.
Through the add_host module we can add a new host in the dynamic inventory.
Give some name to groupname here, I’ve given webserver, and in hostname add Public IP of instance. And I also put loop here so, that if we launch more than 1 instance then all the instances will be added in the webserver group.
After that my playbook is waiting for SSH enable in instance because Ansible needs to login into the instance to configure it as a web server. that is why we have to allow SSH port in the security group of instance. Once the Instance is ready to do SSH then it will go on next play.
- hosts: webserver
  gather_facts: yes
  tasks:
   - name: running role
     include_role:
             name: httpdserver
Finally, on our webserver host group which we just created above, we have to run our Ansible Role named httpdserver. which I mentioned below how to create this Ansible Role.
Ansible Role
Ansible roles are basically a collection of files, tasks, templates, variables, and modules. It is used for breaking a playbook into multiple files. This will helps you to write a complex playbook and make it easier to reuse.
Creating Role
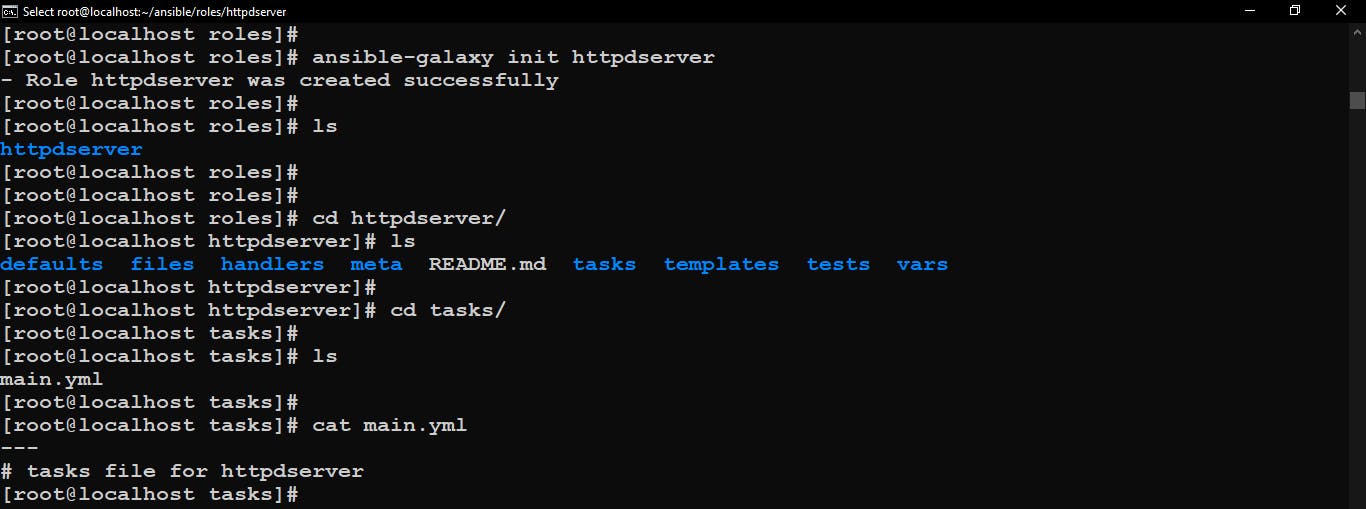
we’ve seen in the last play that we are using one Ansible Role called httpdserver, but first, we need to create it.
For creating Ansible Role we need to go to roles directory that we’ve specified in the ansible.cfg file.
Go into the roles directory in your workspace, where roles will be created, and run this below-mentioned command and one role will be created.
ansible-galaxy init httpdserver
This command will initialize the httpdserver Ansible role in roles directory.
Creating task inside role
Now, we need to write the tasks which will configure HTTPD server on EC2 Instance.
For that go into the httpdserver role (or we can say directory) and then go inside the tasks folder. There we’ve one file called main.yml. we have to edit this main.yml file and write some plays to configure the instance as a web server.
Create httpdserver role
 - name: "Install httpd and php packages"
   package:
       name:
         - "httpd"
         - "php"
       state: present

 - name: "copy code from GitHub"
   get_url:
       url: https://raw.githubusercontent.com/Shashikant17/ansible_task_for_httpdserver/main/index.php
       dest: "/var/www/html/index.php"

 - name: "Start httpd services"
   service:
       name: httpd
       state: started
Here I used the package module to install httpd and php packages. Next using get_url module we fetch code from GitHub and save it in web server default document root path i.e. /var/www/html/ with our code file name, here it is index.php. Finally, use service module to start the service of httpd server.
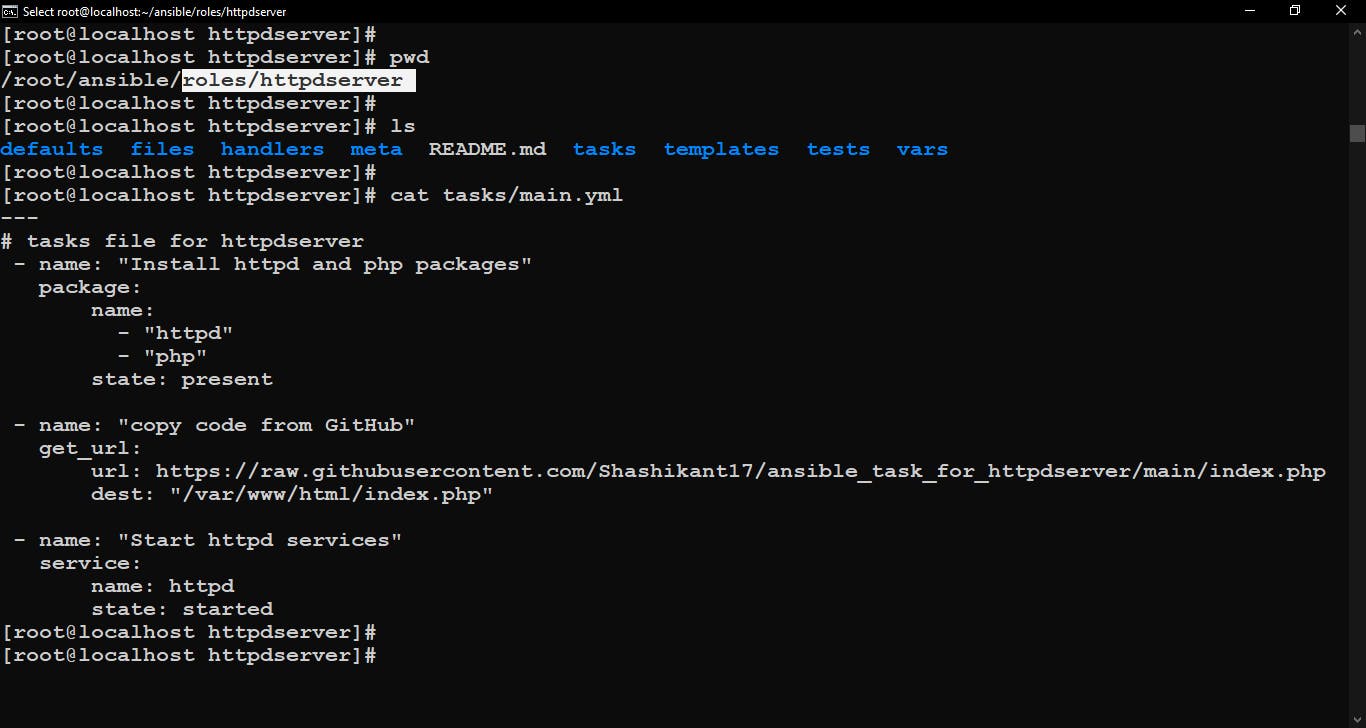
Edit main.yml file in tasks folder.
Now let’s deploy our Ansible Playbook
Go to the workspace where is our Playbook and Run it.
ansible-playbook <playbook_name.yml> --ask-vault-pass
ansible-playbook ansibleTask2.yml --ask-vault-pass
It will run your playbook but just before running playbook, this command will ask vault password, give that password and you will see your deployment started perfectly fine.
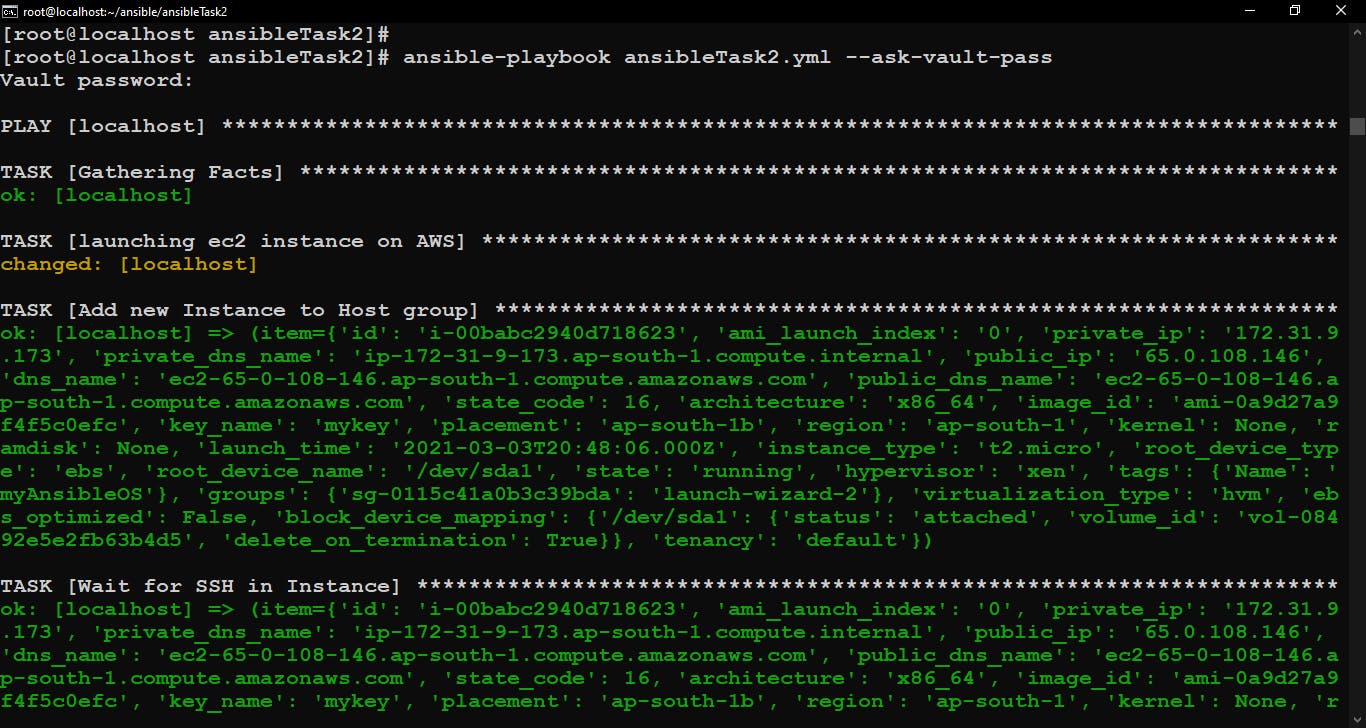
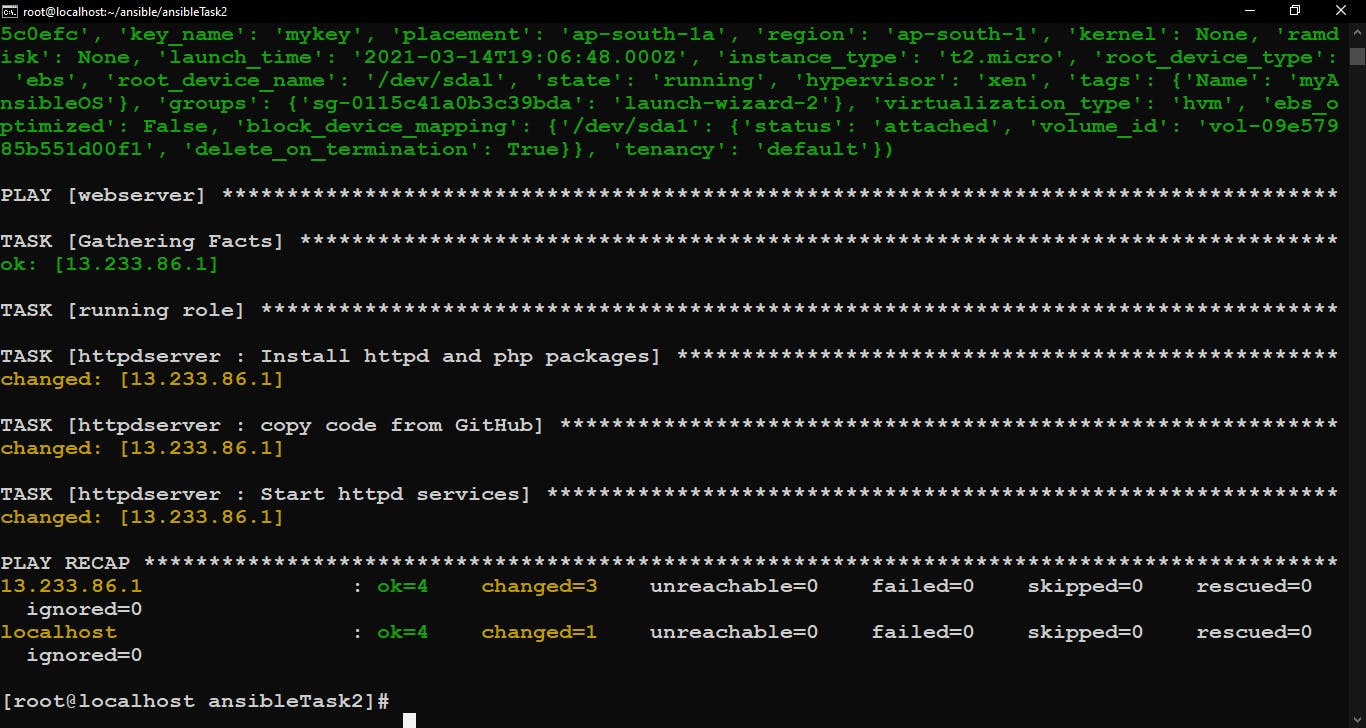
Playbook runs successfully…Now check your EC2 instance on AWS and put its Public IP in the browser
Finally, if you go to the browser and type the public IP of the instance you will see that your web page is working completely fine.
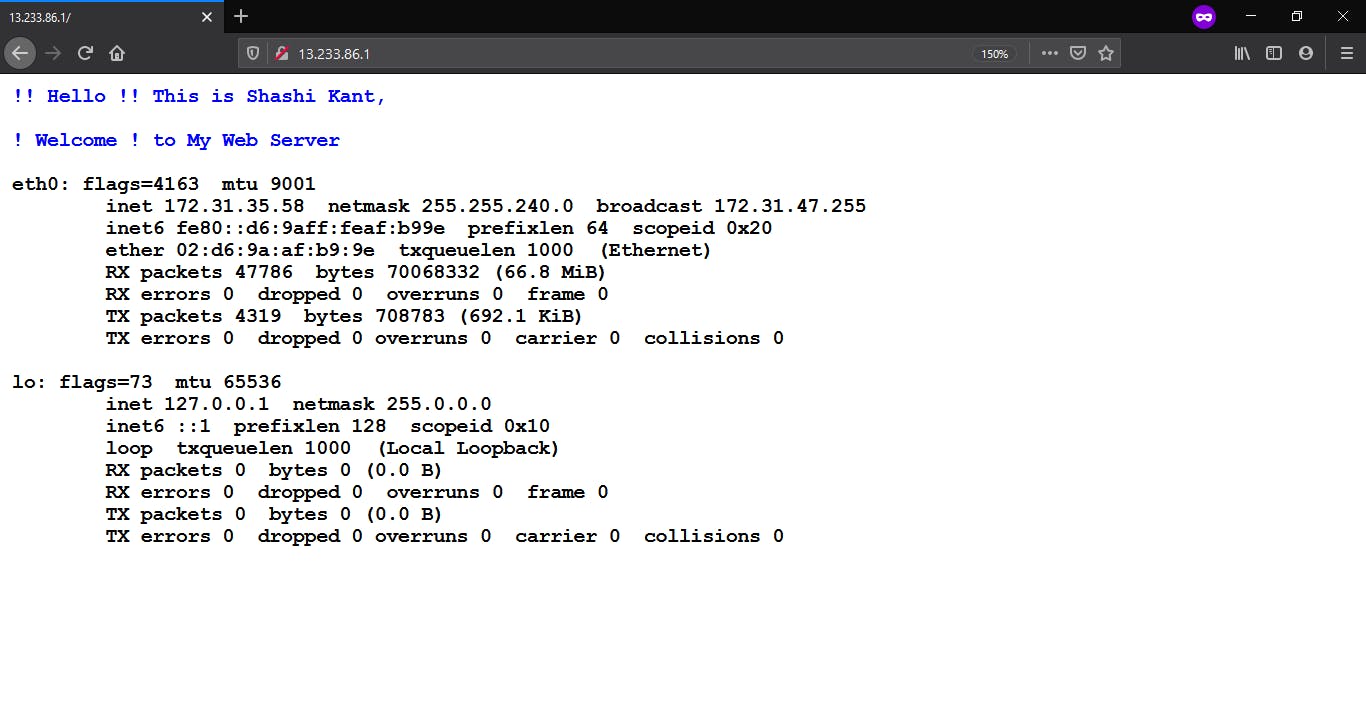
Apache Web server is configured successfully by Ansible.
GitHub Repository Link for my Ansible playbook - GitHub Repo
That’s All, Keep Learning.
! THANK YOU For Reading !