

Task Description
Create High Availability Architecture with AWS CLI. The architecture includes -
- Web server configured on EC2 Instance.
- Document Root(/var/www/html) made persistent by mounting on EBS Block Device.
- Static objects used in code such as pictures stored in S3
- Setting up Content Delivery Network using Cloudfront and using the origin domain as S3 bucket.
- Finally, place the Cloud Front URL on the web-app code for security and low latency.
What is AWS CLI ?
The AWS Command Line Interface (CLI) is a unified tool to manage your AWS services. With just one tool to download and configure, you can control multiple AWS services from the command line and automate them through scripts. (Source: aws.amazon.com)
Install AWS CLI
So, first, we need to install AWS CLI on our OS from where we're going to run commands. Go to the below link and Download AWS CLI according to your OS.
Click Here and Download Latest Version of AWS CLI
After downloading the AWS CLI, Install it.
Now, open a fresh command prompt or Terminal and run the below command.
aws --version
If the above command runs successfully, then your AWS CLI is installed successfully.
Configure AWS IAM Account with CLI
So, for using AWS services in CLI first we've to login (configure) inside AWS CLI. and for that, we need to have an IAM account in AWS Account.
aws configure
Run the above command to configure AWS CLI.
This command will ask you for Access key ID, Secret Access Key, Region name, and output format (by default - JSON). provide these details and your CLI setup will be completed.
So, Lets Get Started
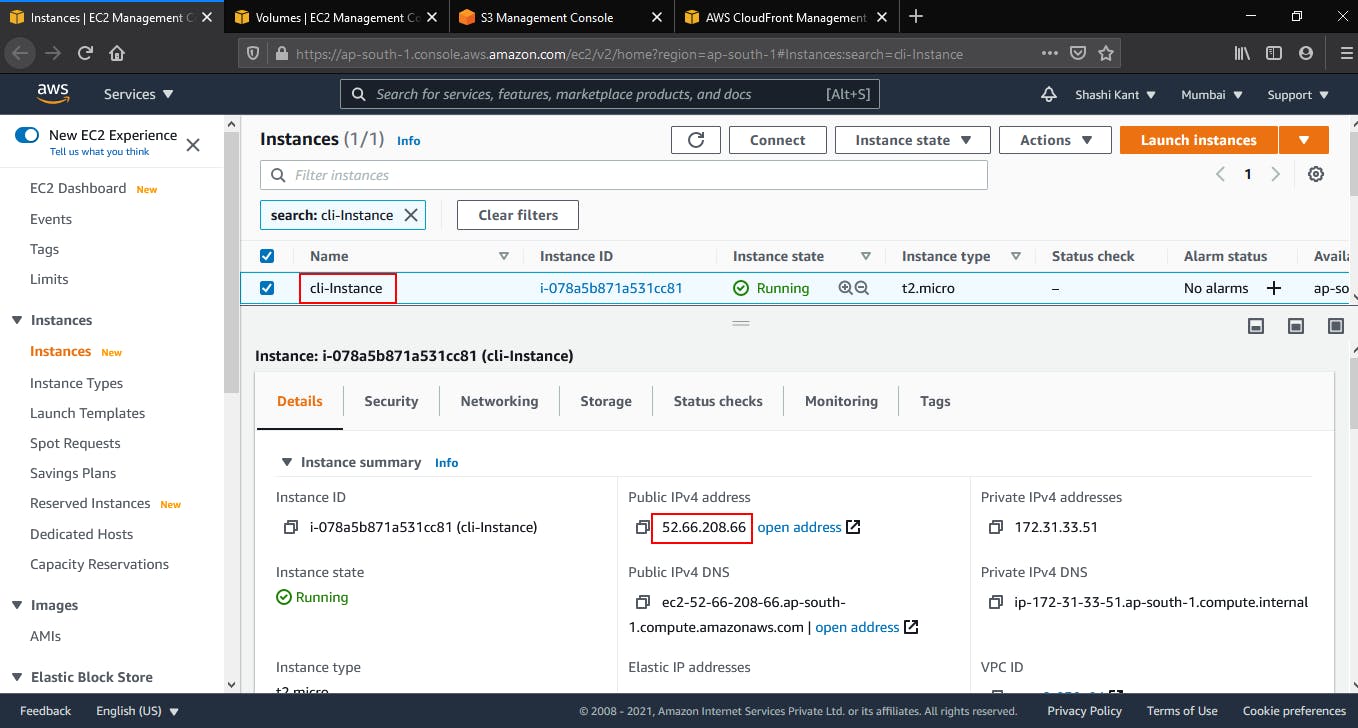
Launch an EC2 Instance.
Run below command in terminal to launch AWS instance.
aws ec2 run-instances --image-id ami-068d43a544160b7ef --count 1 --instance-type t2.micro --key-name mykey --security-group-ids sg-0115c41a0b3c39bda --tag-specifications ResourceType=instance,Tags=[{Key=Name,Value=cli-Instance}]
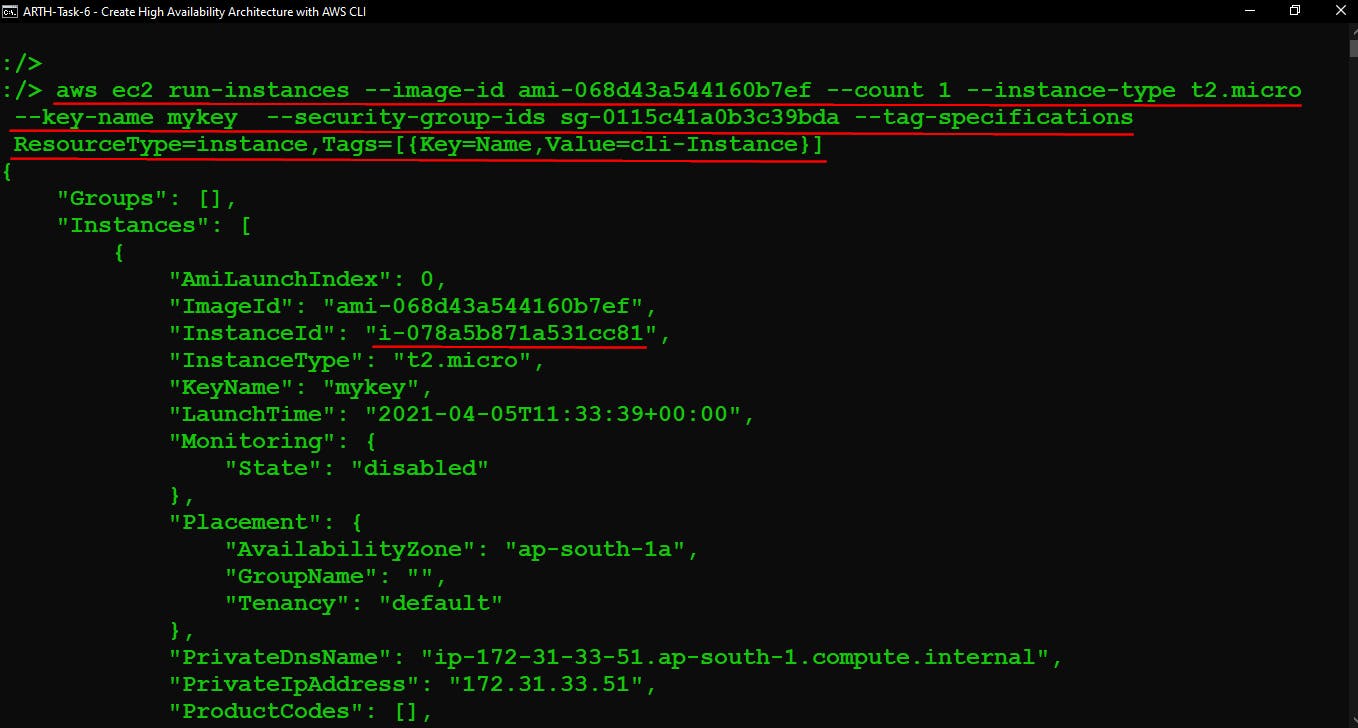
After successfully running the above command Instance will be launched on AWS.
Create EBS Volume
Create an EBS Volume for Instance launched above to persist Data on Instance. Here, I launched 1 Gib Size of EBS Volume.
aws ec2 create-volume --availability-zone ap-south-1b --volume-type gp2 --size 1 --tag-specifications ResourceType=volume,Tags=[{Key=Name,Value=EBS_for_cli-Instance}]
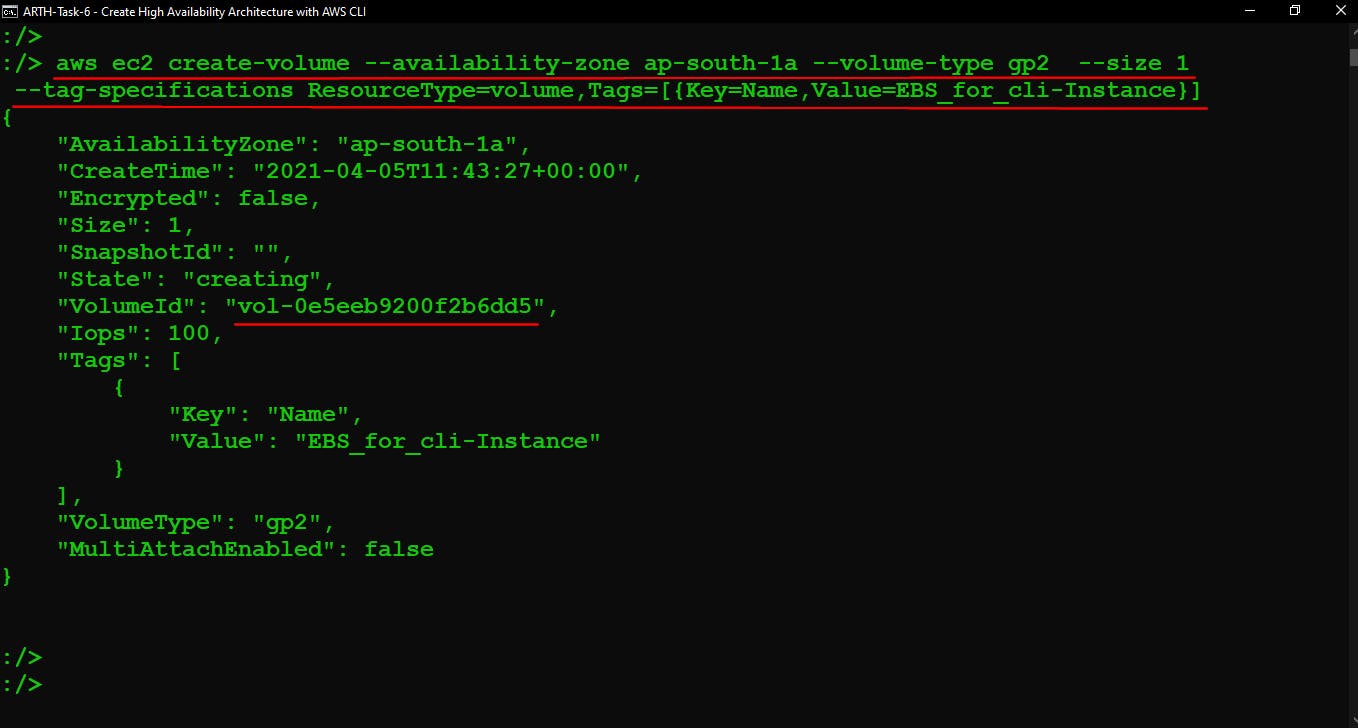
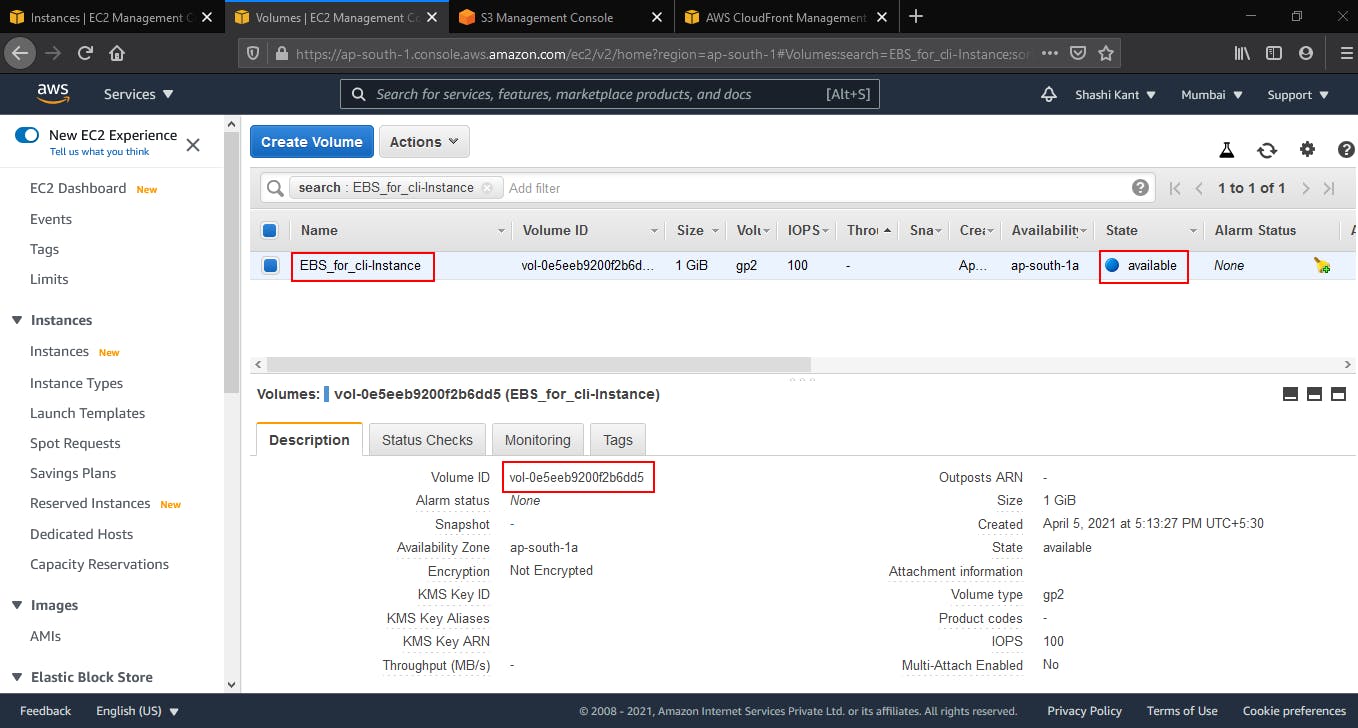
After successfully running the above command EBS Volume will be created.
Attach EBS Volume with EC2 Instance
Now attach EBS Volume with EC2 Instance using the below command.
aws ec2 attach-volume --volume-id vol-0e5eeb9200f2b6dd5 --instance-id i-078a5b871a531cc81 --device /dev/sdb
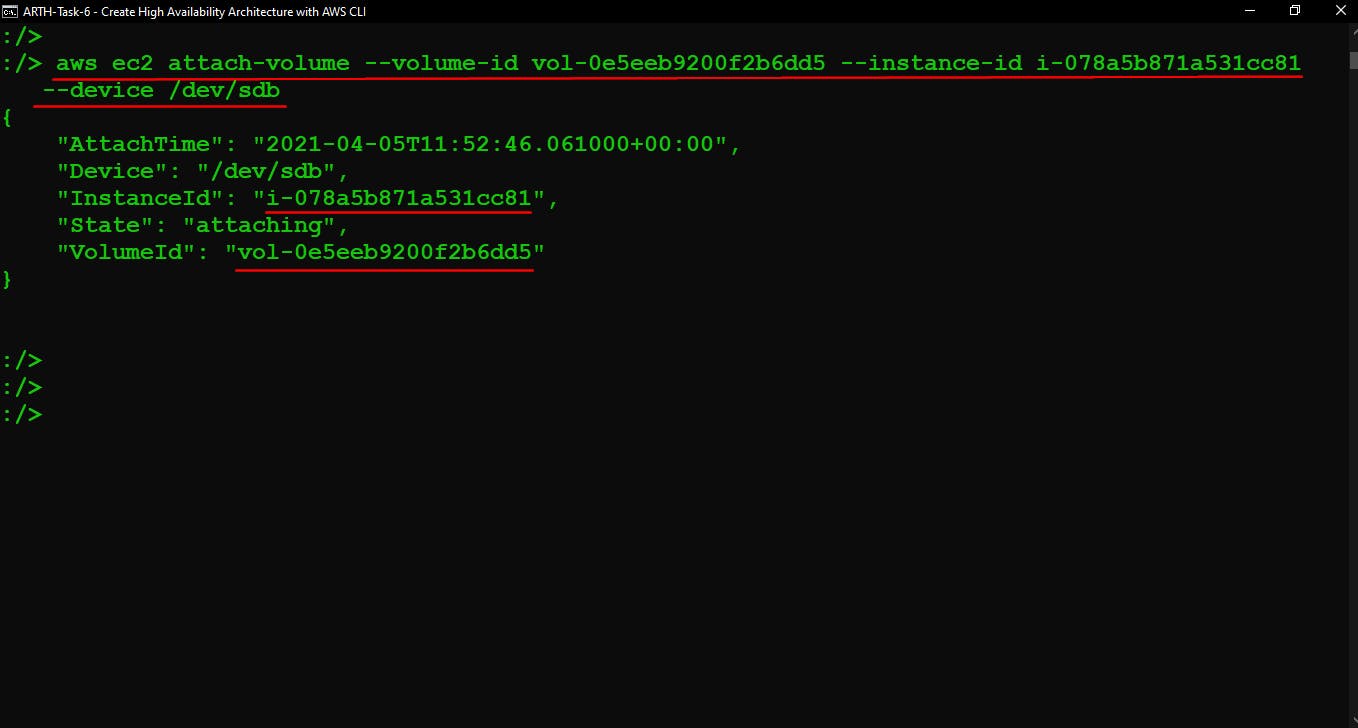
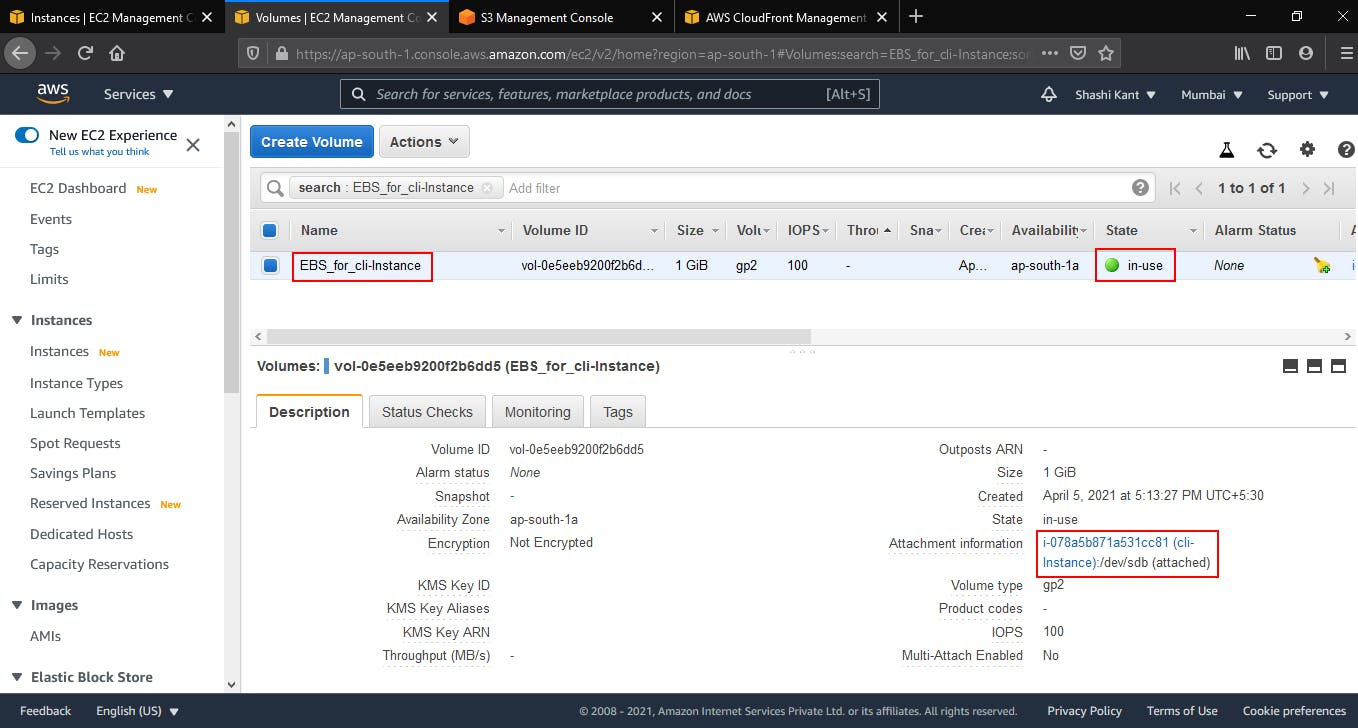
After successfully running the above command EBS Volume will be attached. we can also confirm in AWS, that our 1 Gib size of the volume is attached in the '/dev/sdb' location and it is 'in-use' now.
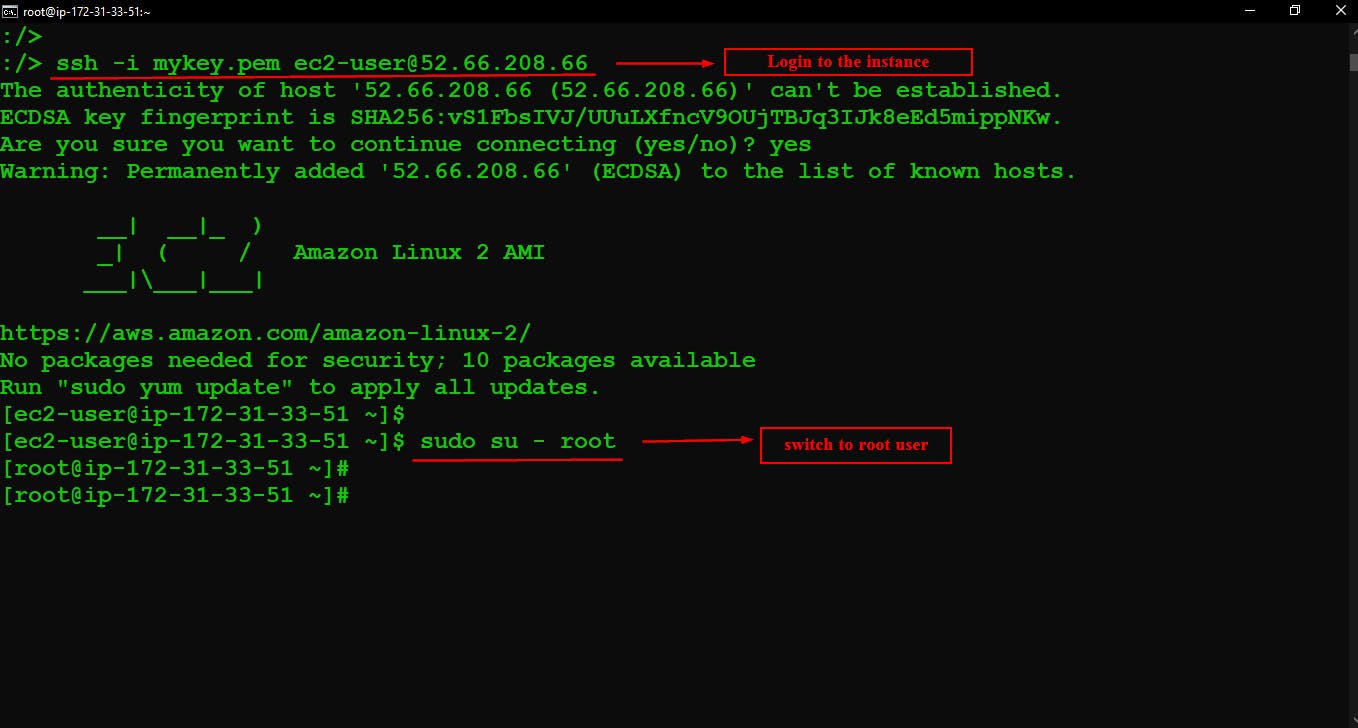
Connect to Instance - using SSH protocol
ssh -i <key_name> <user_name>@<IP_Address>
                 or
ssh -i <key_name> -l <user_name> <IP_Address>
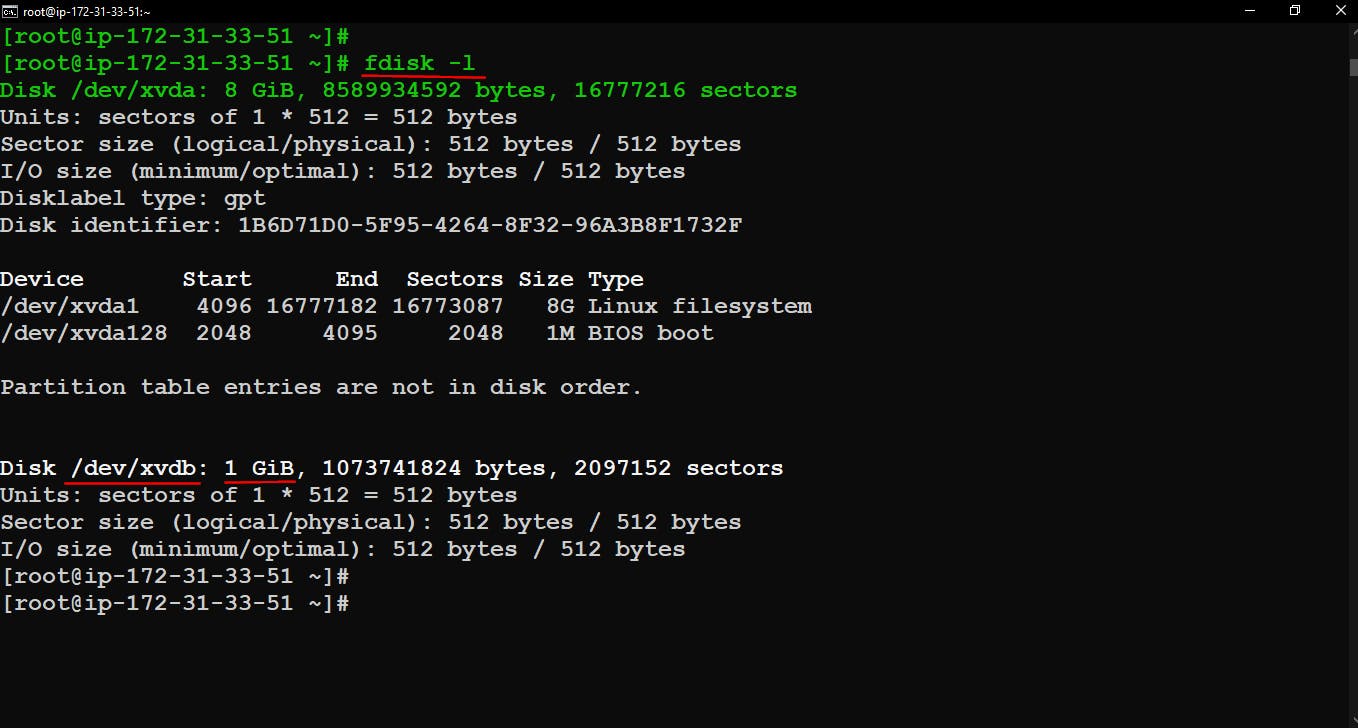
Create Partition inside Hard Disk ( EBS Volume )
we can also check from Instance that our EBS volume is attached or not using the below command.
fdisk -l
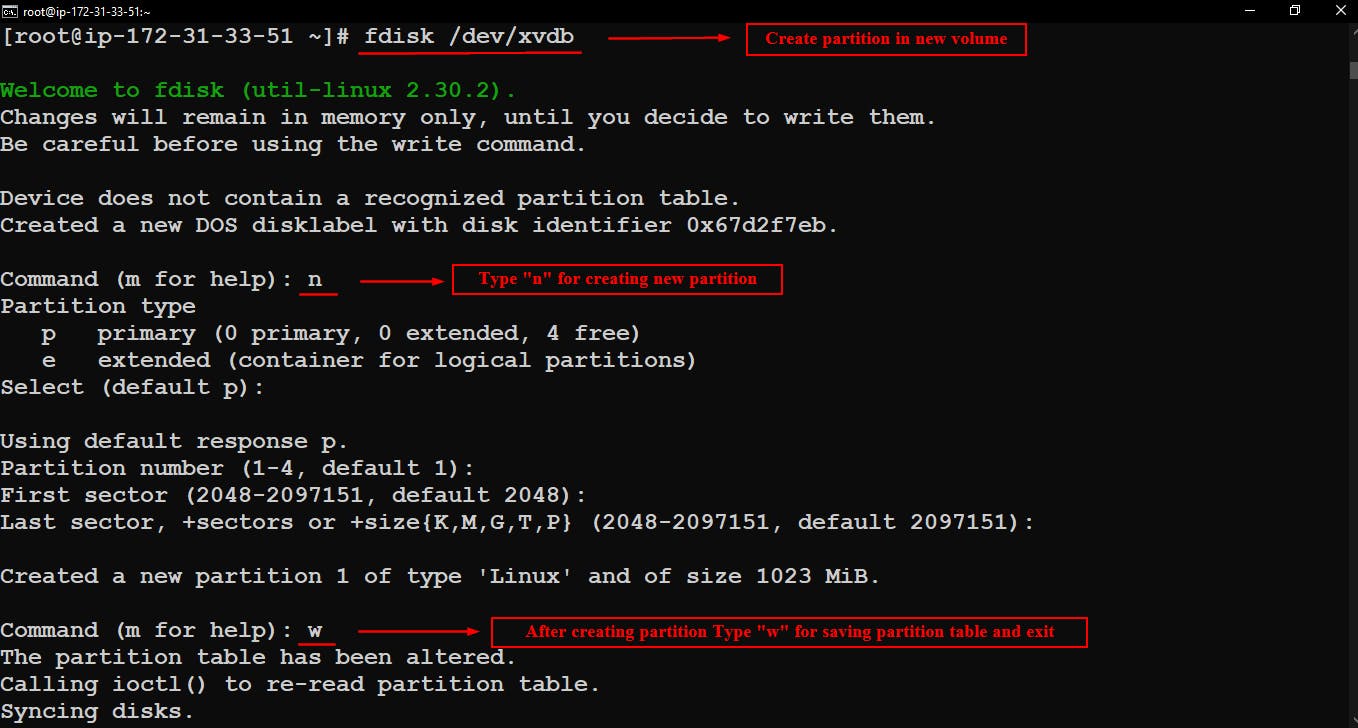
Now create a partition in the new hard disk for using it.
For creating the partition in the new hard disk use below commands.
But before running commands read the Important Notes below.
fdisk  /dev/sdb
       or
fdisk  /dev/xvdb
After running the above command.
Important Notes
Type
nfor creating a new partition table.Then it will basically ask for the size of the partition table, here you can skip it and press enter to give full 1 Gb size to this partition.
Finally type
wto save the partition table.
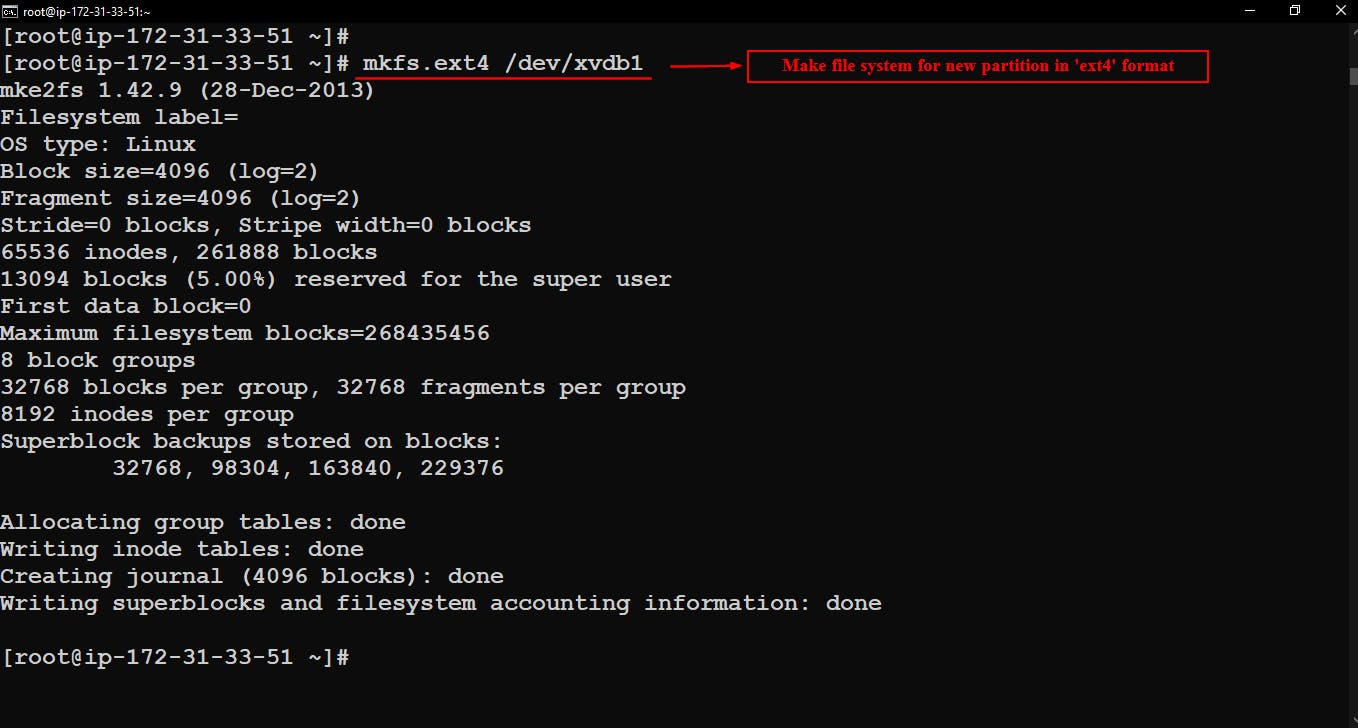
After creating a partition we have to format that partition. So for that here I'm using ext4 format.
mkfs.ext4 /dev/xvdb1
After running the above command your newly created partition will be formatted in ext4 format.
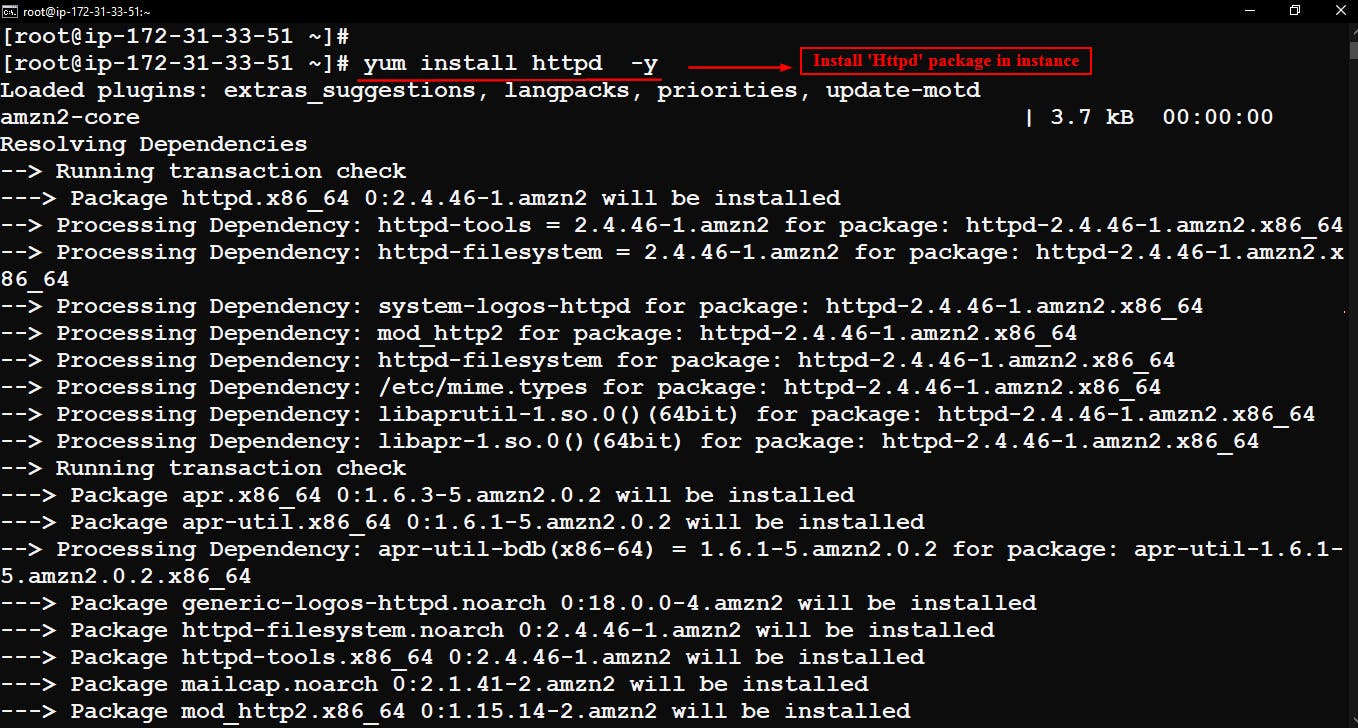
Install Httpd package
For running a web server, I'm using HTTPD server.
yum install httpd -y
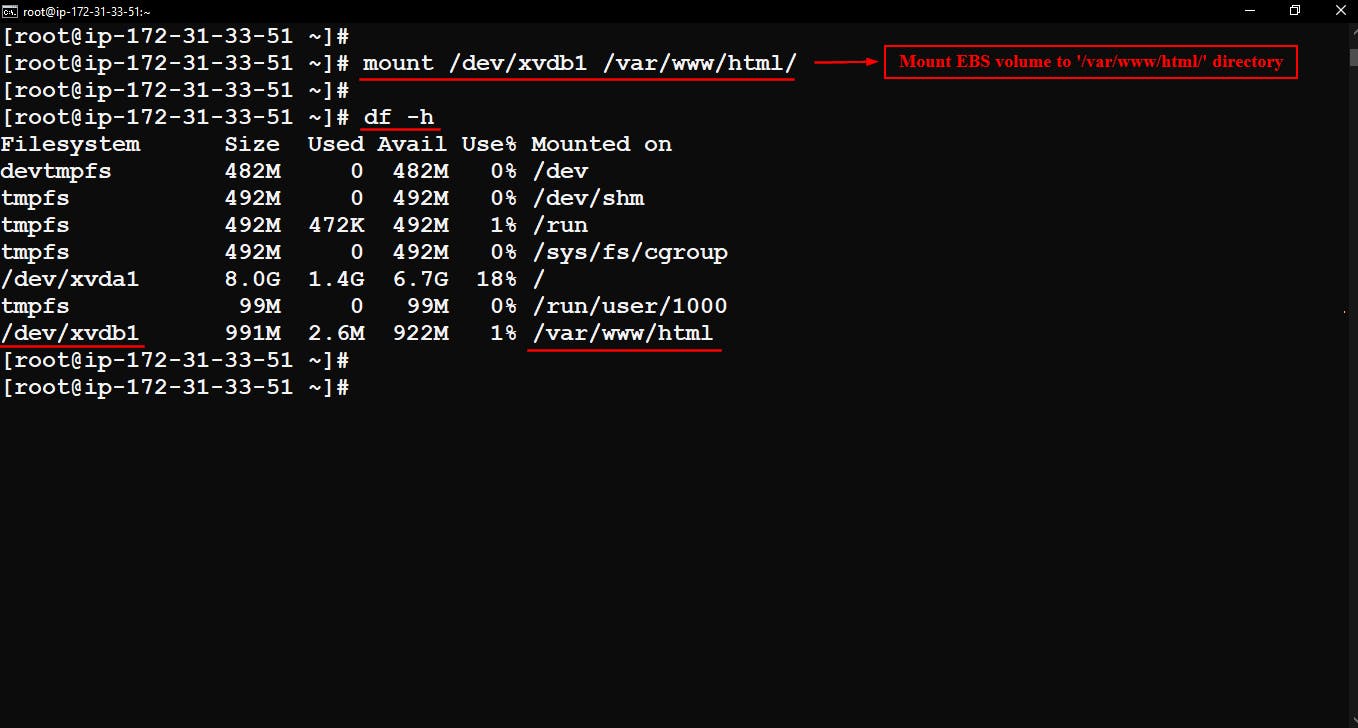
Mount EBS Volume to the web server
For keeping data persistent mount EBS volume to root directory of web server, Here in case of HTTPD server document root directory is /var/www/html/
mount /dev/xvdb1 /var/www/html/
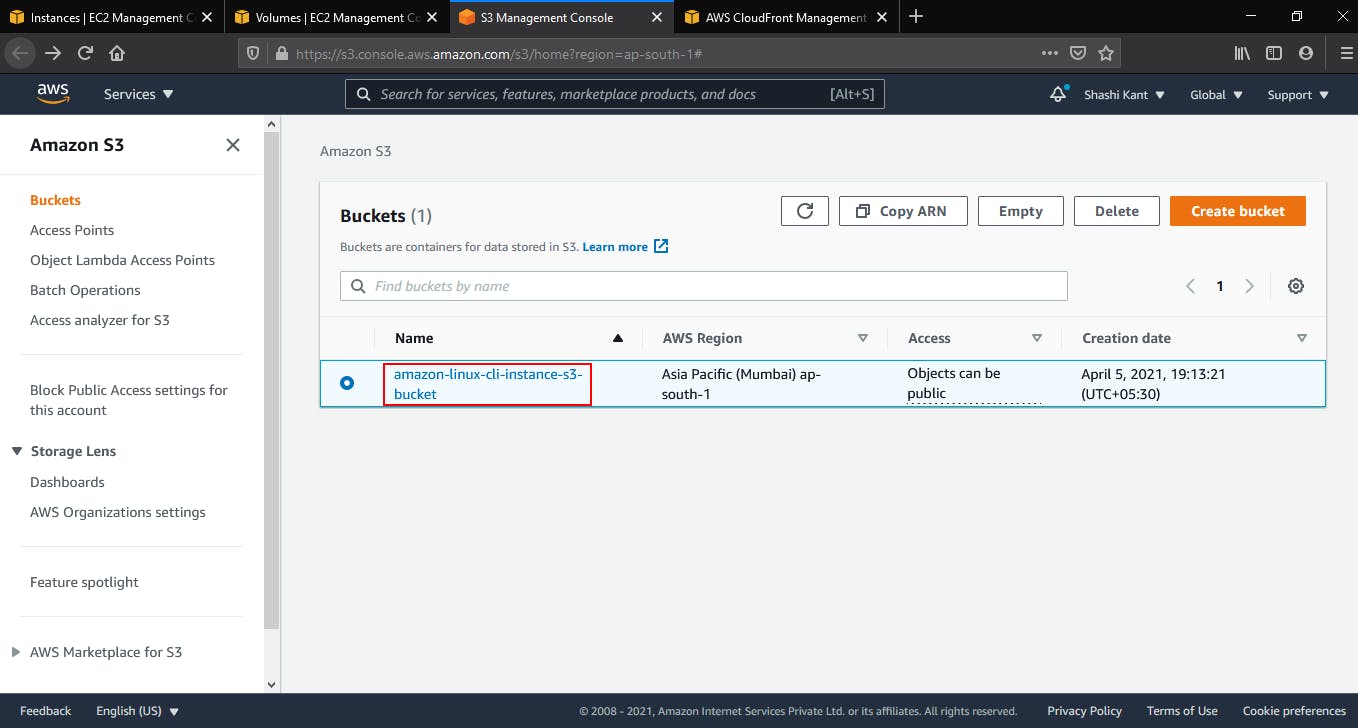
Create S3 bucket
Create an S3 bucket to put static objects of webserver content into it. like photos, videos, etc.
aws s3api create-bucket --bucket amazon-linux-cli-instance-s3-bucket --region ap-south-1 --create-bucket-configuration LocationConstraint=ap-south-1
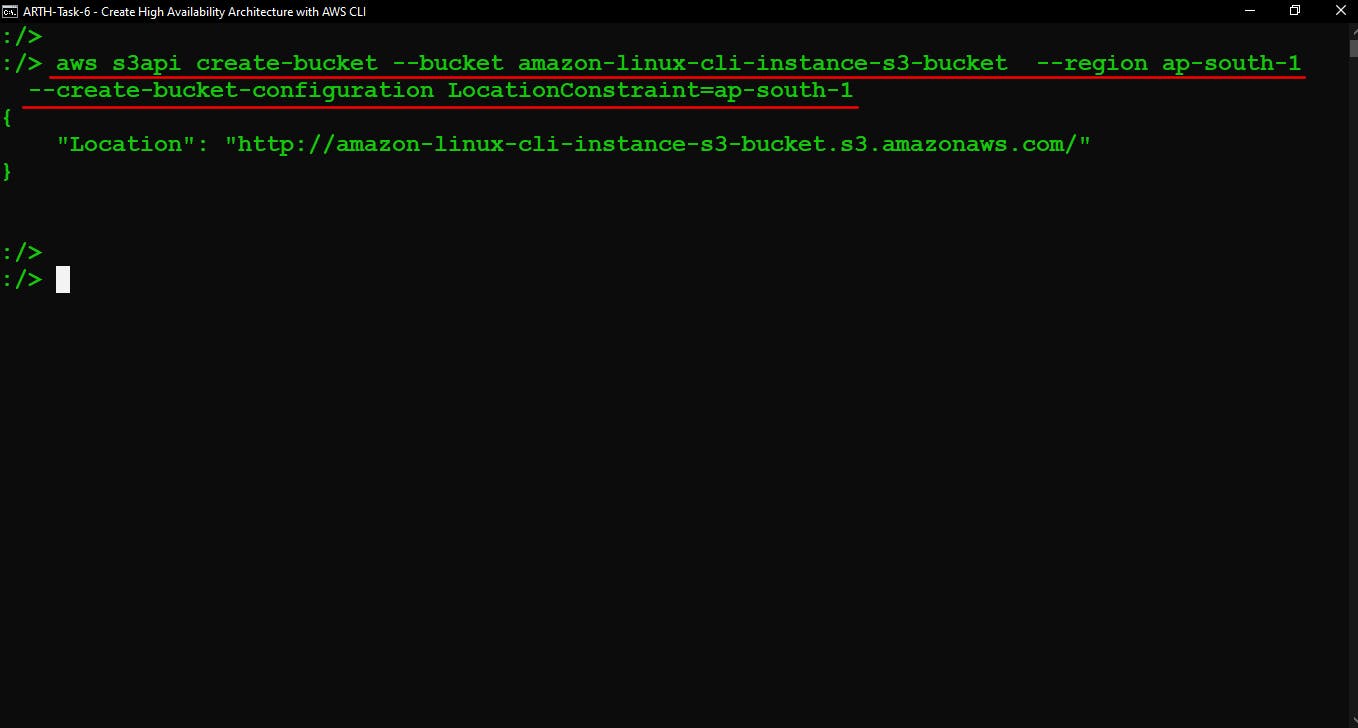
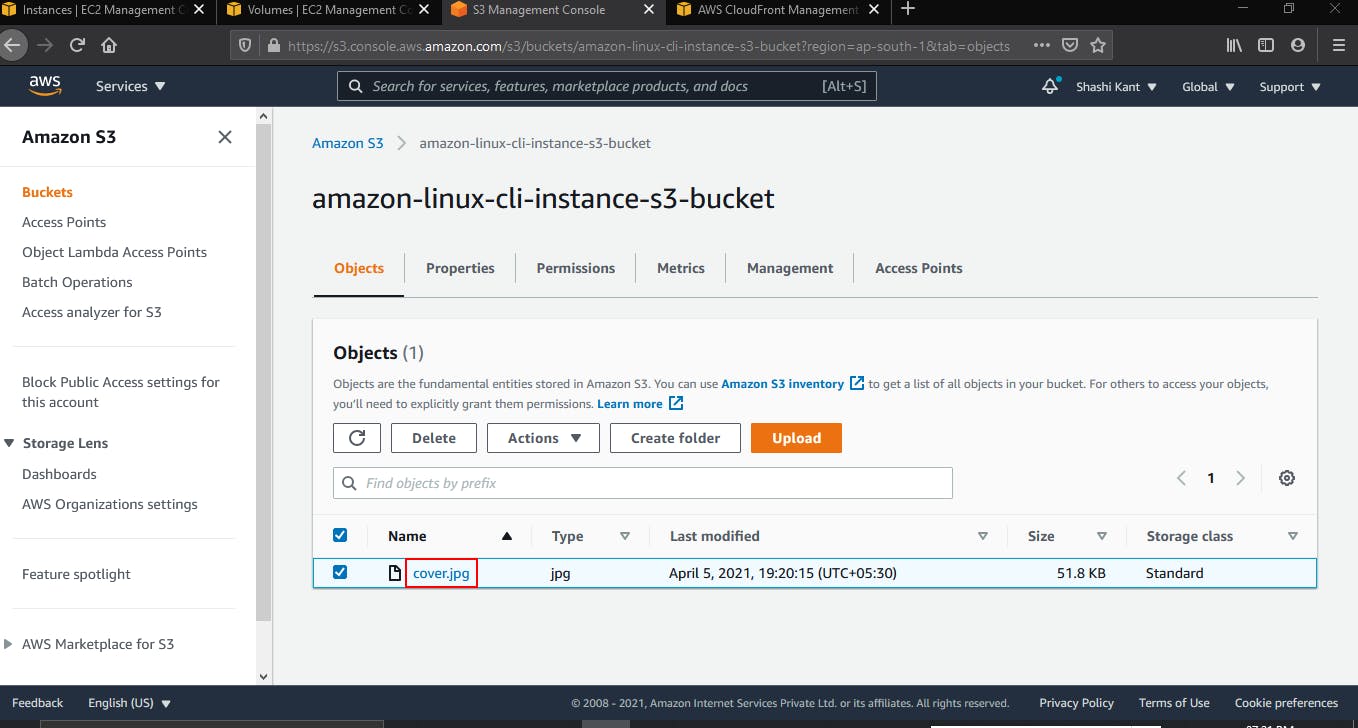
The above command will create an S3 bucket in AWS, which can be confirmed in the browser.
Upload Data in S3 bucket
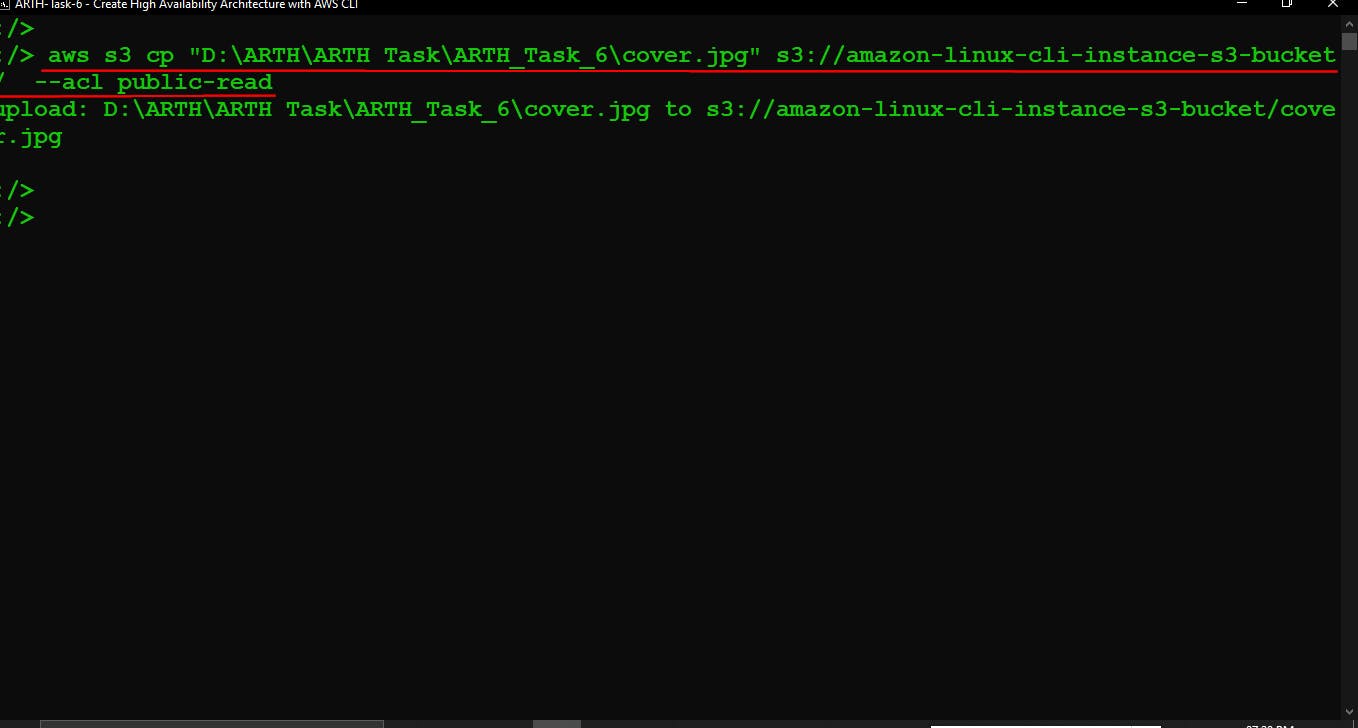
We have dump some data in the bucket. I have uploaded one .jpg file inside the bucket using the below command.
aws s3 cp "D:\ARTH\ARTH Task\ARTH_Task_6\cover.jpg" s3://amazon-linux-cli-instance-s3-bucket/ --acl public-read
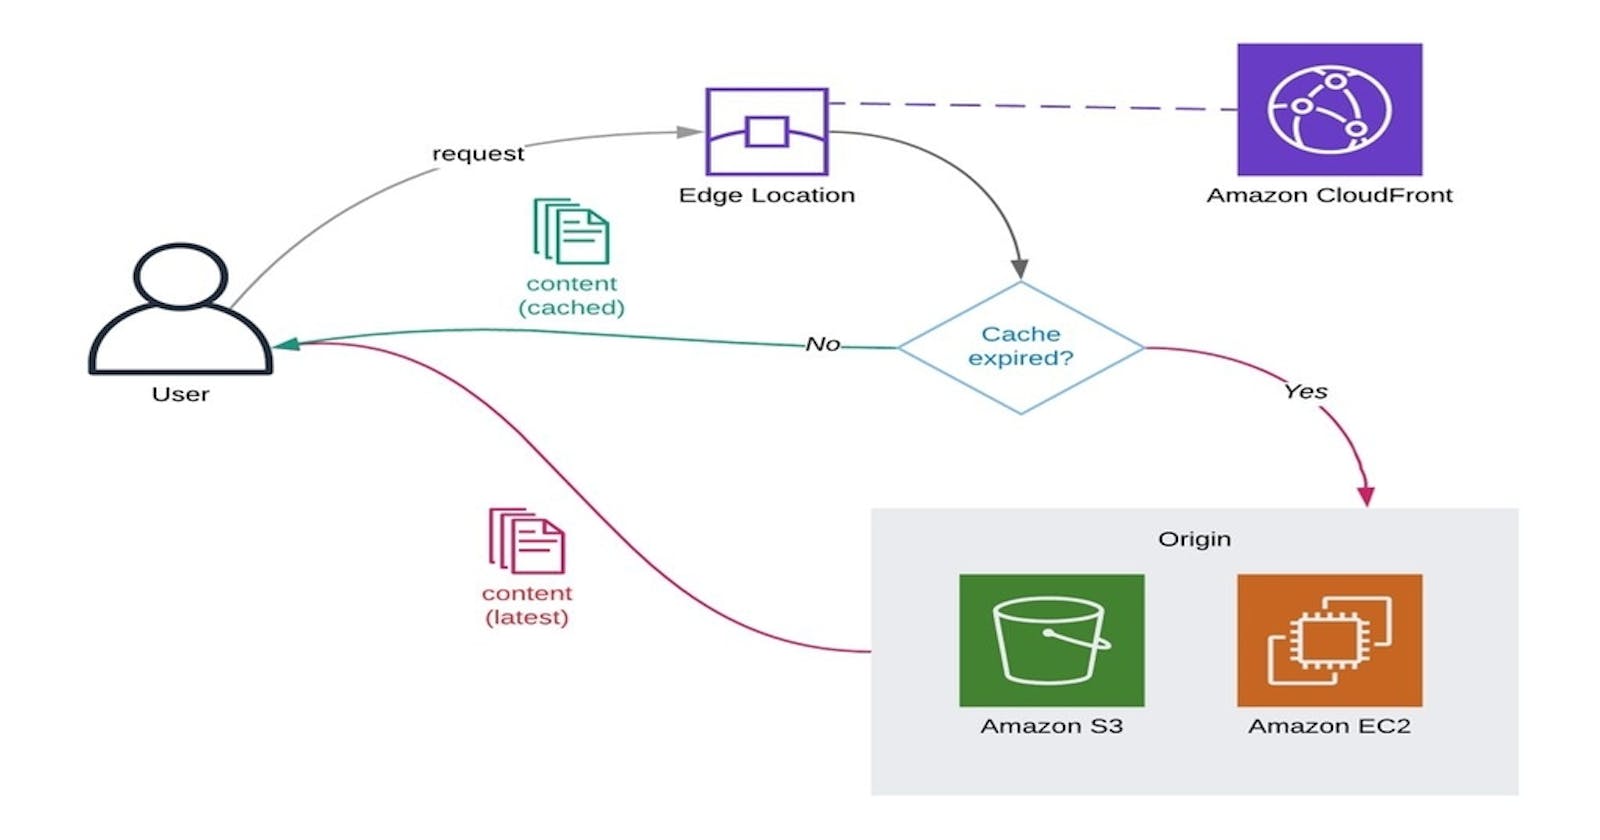
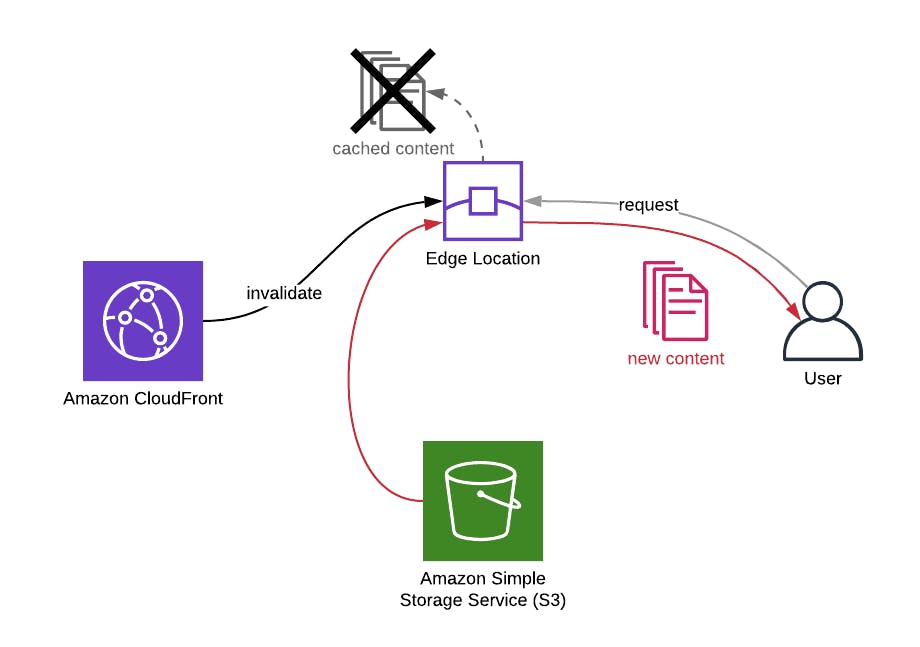
Create CloudFront Distribution
Now we have to create a content delivery network using CloudFront and origin domain as S3 bucket for security and low latency in web server content.
aws cloudfront create-distribution --origin-domain-name amazon-linux-cli-instance-s3-bucket.s3.amazonaws.com --default-root-object cover.jpg
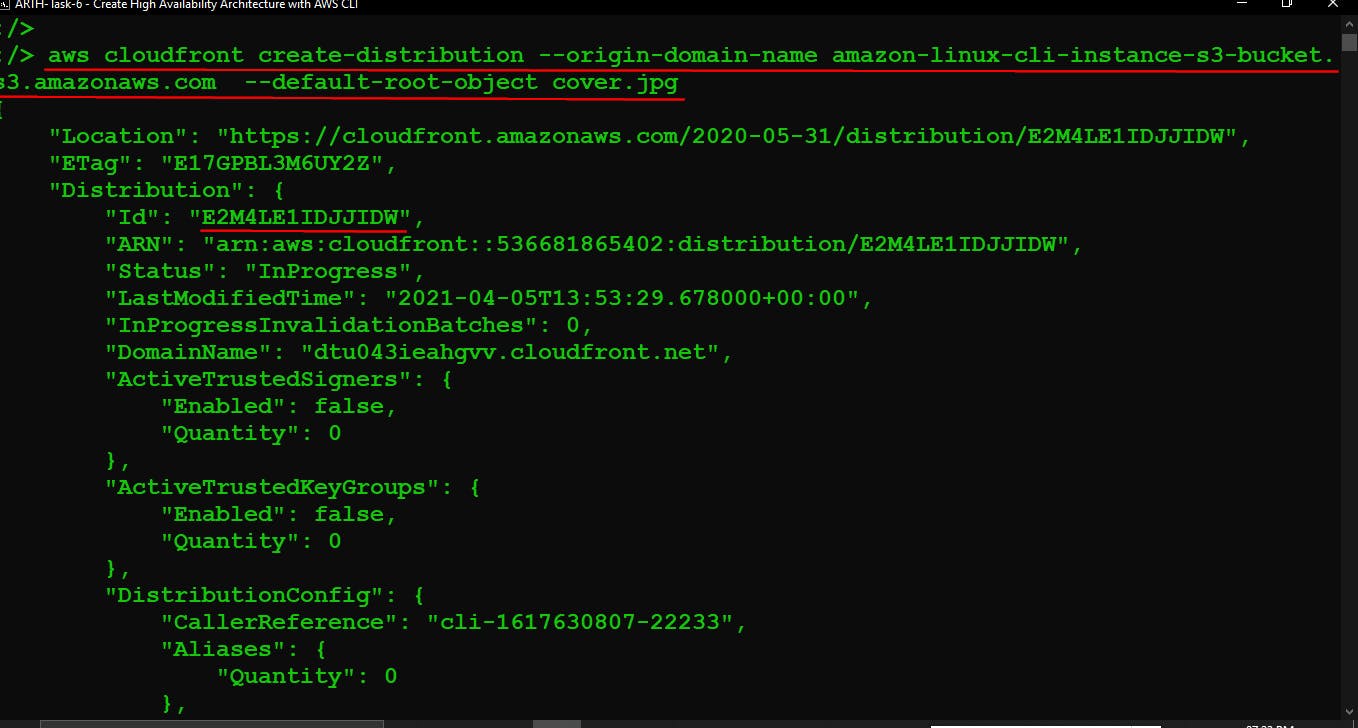
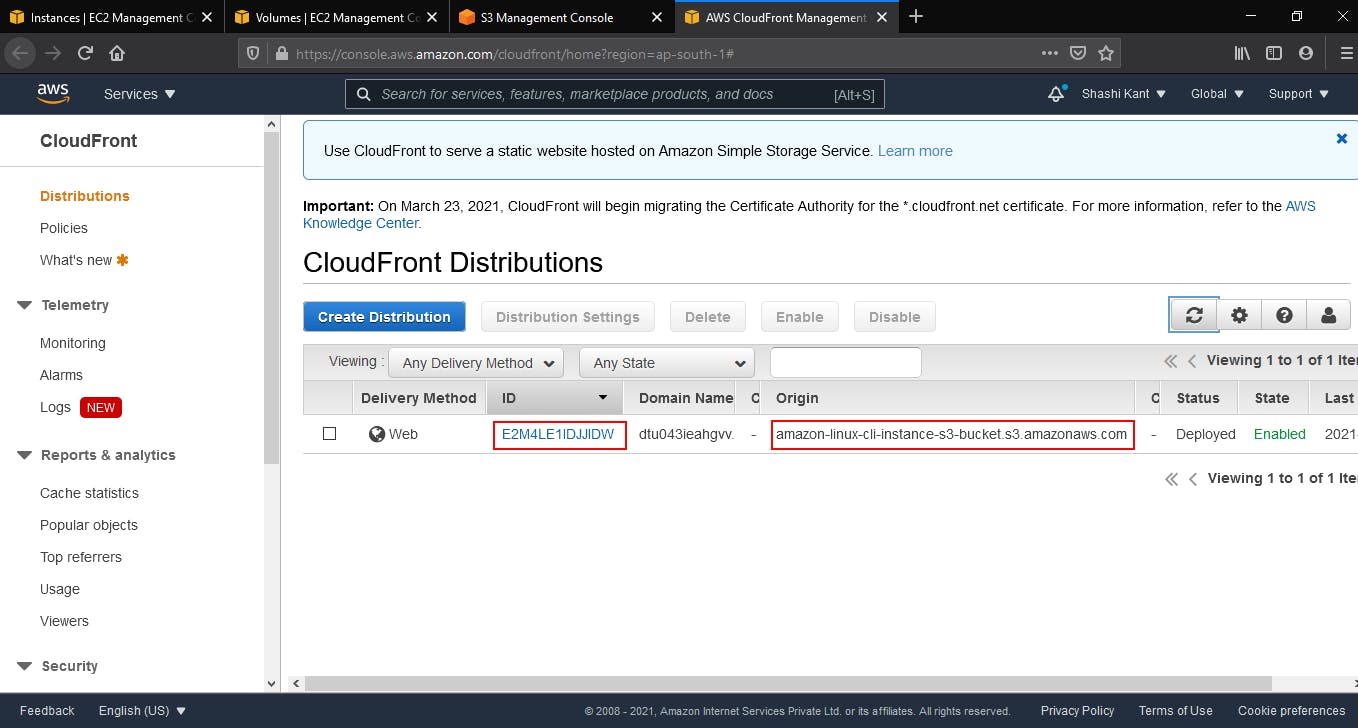
Using above command CloudFront distribution will be created, which we can see in browser.
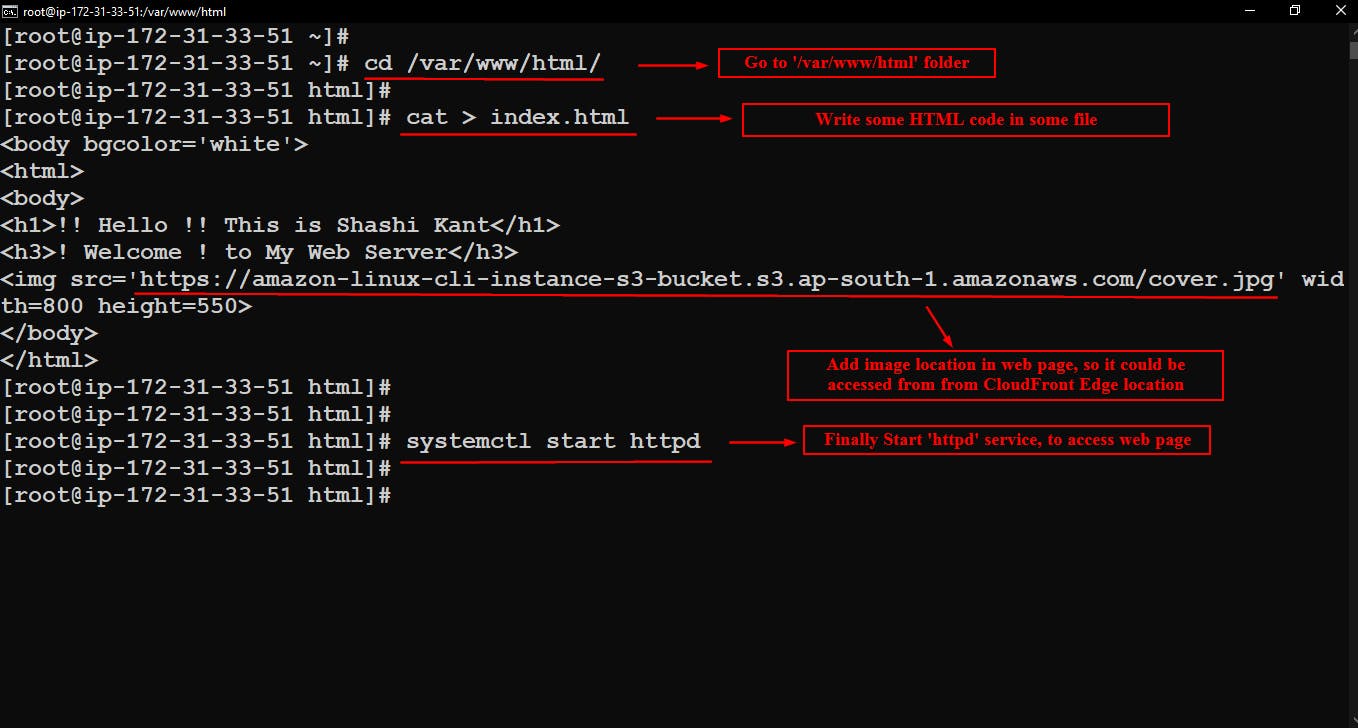
Start HTTPD Web Server
Before starting HTTPD server we have to put some content in the webserver and link of static object, so the object could be accessed using the content delivery network (CloudFront Distribution).
So, put some content in document root of HTTPD server /var/www/html. Go inside this directory and write some code in HTML or PHP whichever you like.
Here, I've written some code in HTML in index.html file
<body bgcolor='white'>
<html>
<body>
<h1>!! Hello !! This is Shashi Kant</h1>
<h3>! Welcome ! to My Web Server</h3>
<img src='https://amazon-linux-cli-instance-s3-bucket.s3.ap-south-1.amazonaws.com/cover.jpg' width=800 height=550>
</body>
</html>
After writing code start web server service.
systemctl start httpd
After running above commands successfully.
Go to browser and type your instance Public IP Address in browser and go to file in which you've written code, in my case it is index.html.
<public_IP>/file_name.html
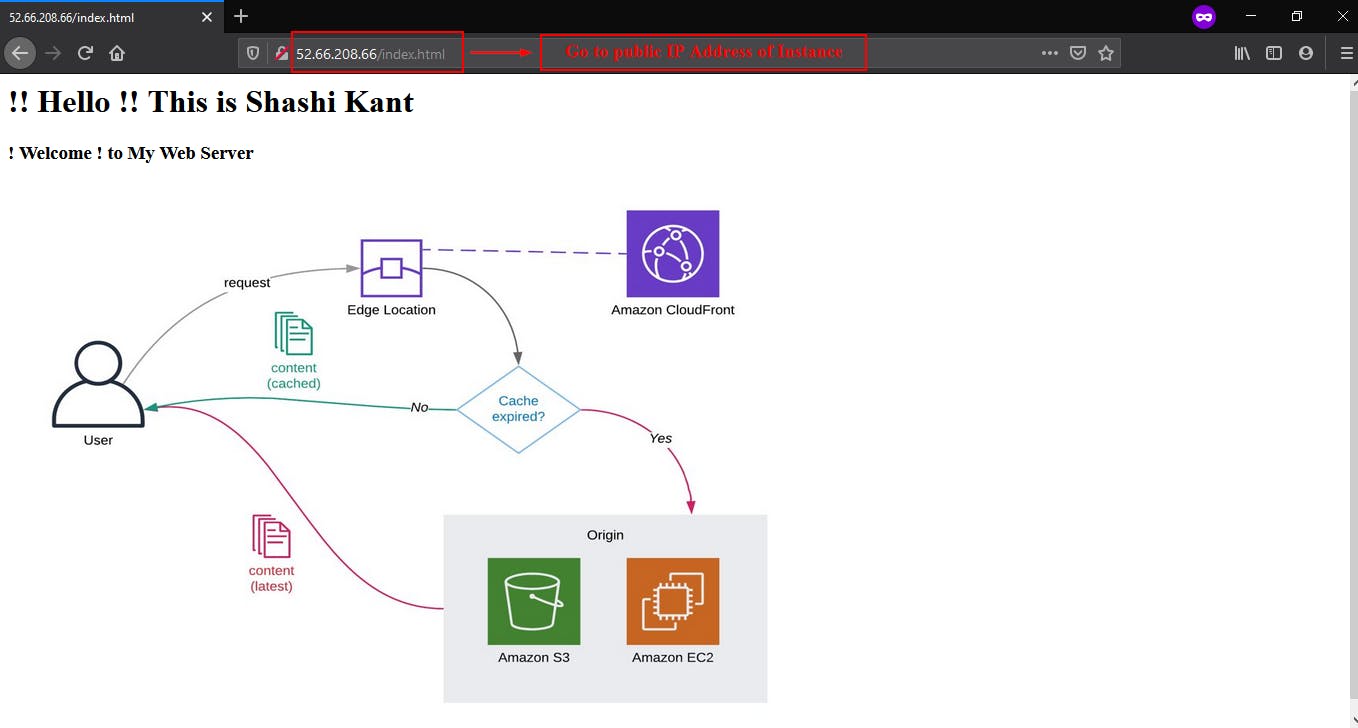
So, here our objective is completed.
CloudFront Distribution is working completely fine. CloudFront also provides a statistical report in which we can see the Cache Statistics, Popular objects, Top Referrers, Usage, Viewers from different Locations so that we get know about Cache Miss and Hit also and much other information.
That's All, Keep Learning.
! Thank You for Reading !