TASK Description -
Create a key pair.
Create a security group.
Launch an instance using the above-created key pair and security group.
Create an EBS volume of 1 GB.
The final step is to attach the above-created EBS volume to the instance you created in the previous steps.
What is AWS CLI?
The AWS Command Line Interface (CLI) is a unified tool to manage your AWS services. With just one tool to download and configure, you can control multiple AWS services from the command line and automate them through scripts. (Source: aws.amazon.com)
Install AWS CLI
So, first, we need to install AWS CLI on our OS from where we’re going to run commands.
Go to the below link and Download AWS CLI according to your OS.
After downloading the AWS CLI, Install it.
Now, open a fresh command prompt or Terminal and run the below command.
aws --version
If the above command runs successfully, then your AWS CLI is installed successfully.
Configure AWS IAM Account with CLI
So, for using AWS services in CLI first we’ve to login (configure) inside AWS CLI. and for that, we need to have an IAM account in AWS Account.
aws configure
Run the above command to configure AWS CLI.
This command will ask you for Access key ID, Secret Access Key, Region name, and output format (by default — JSON).** provide these details and your CLI setup will be completed.
So, Lets Get Started
Create Key Pair
First, we’ve to create key for Instance to login in to it.
A key pair, consisting of a private key and public key, is a pair of security credentials.
aws ec2 create-key-pair --key-name <key_name>
aws ec2 create-key-pair --key-name task3
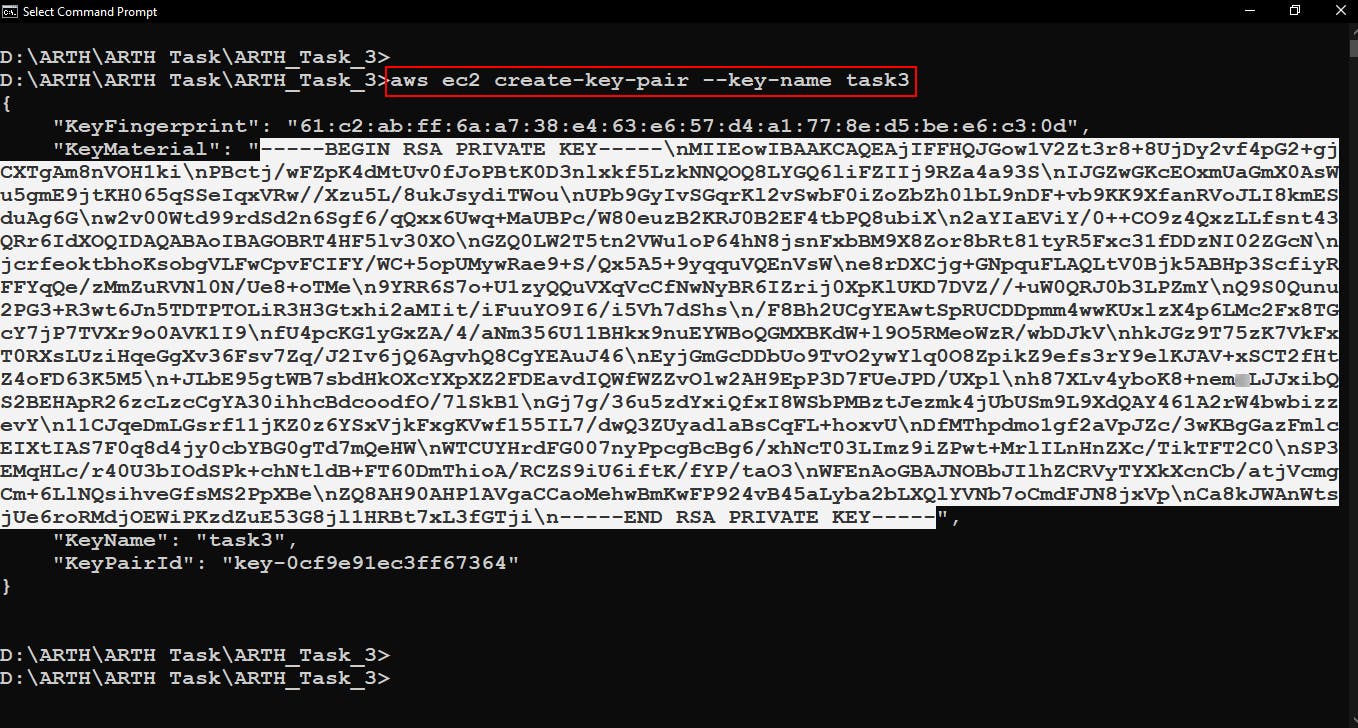 copy selected area.
Copy the selected area of output in a file and save it in a file with the same name you have given to key. And the extension of file should be .pem or .ppk’
For example - key_name.pem or key_name.ppk.
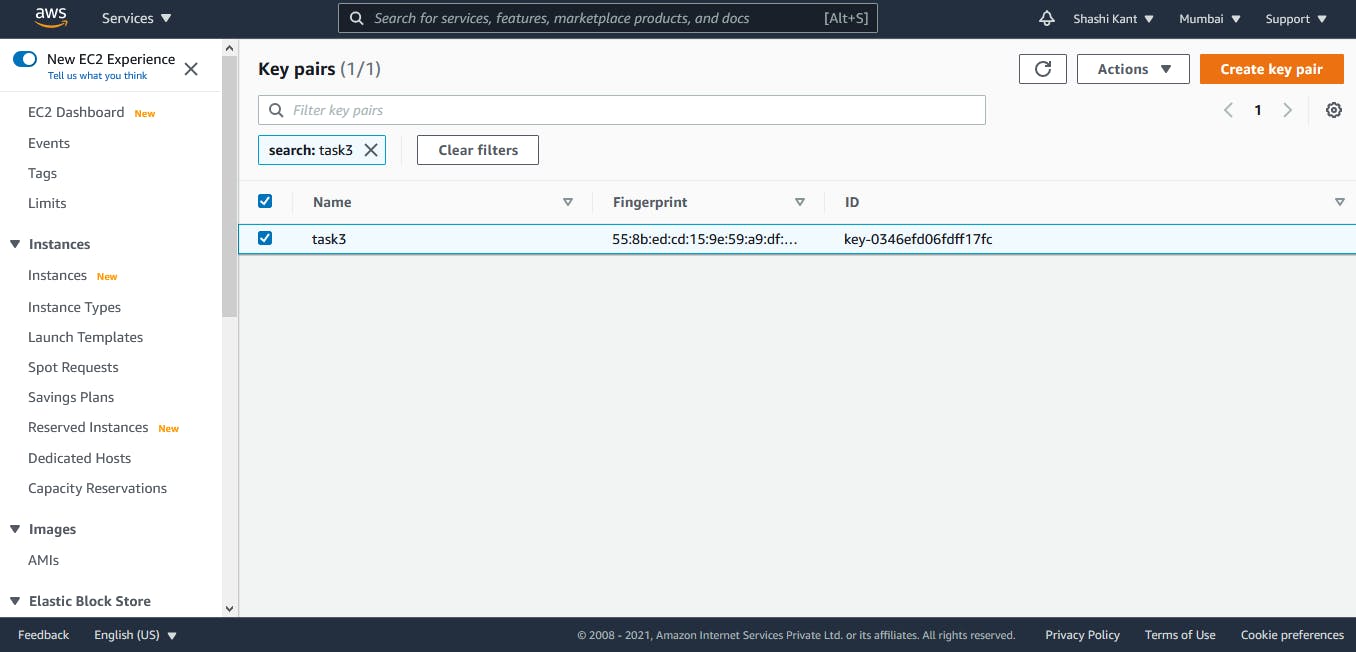 Key created successfully
Create Security Group
Now, let's create Security Group for Instance. and add Ingress rule for SSH on port no. 22, to login into the instance.
aws ec2 create-security-group --group-name <security_group_name> --description <"Description_for_Security_group">
aws ec2 authorize-security-group-ingress --group-id <security_group_id> --protocol tcp --port 22 --cidr 0.0.0.0/0
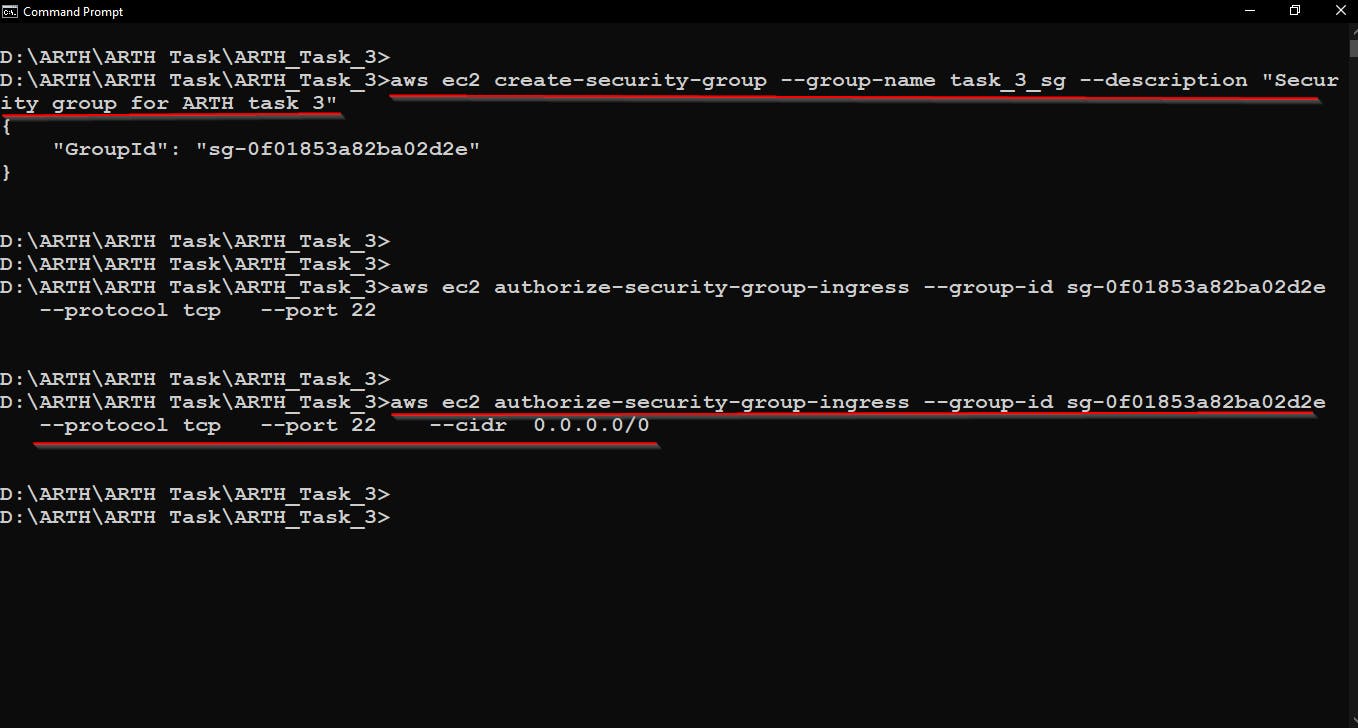
creating a security group and adding ingress rule to allow SSH protocol
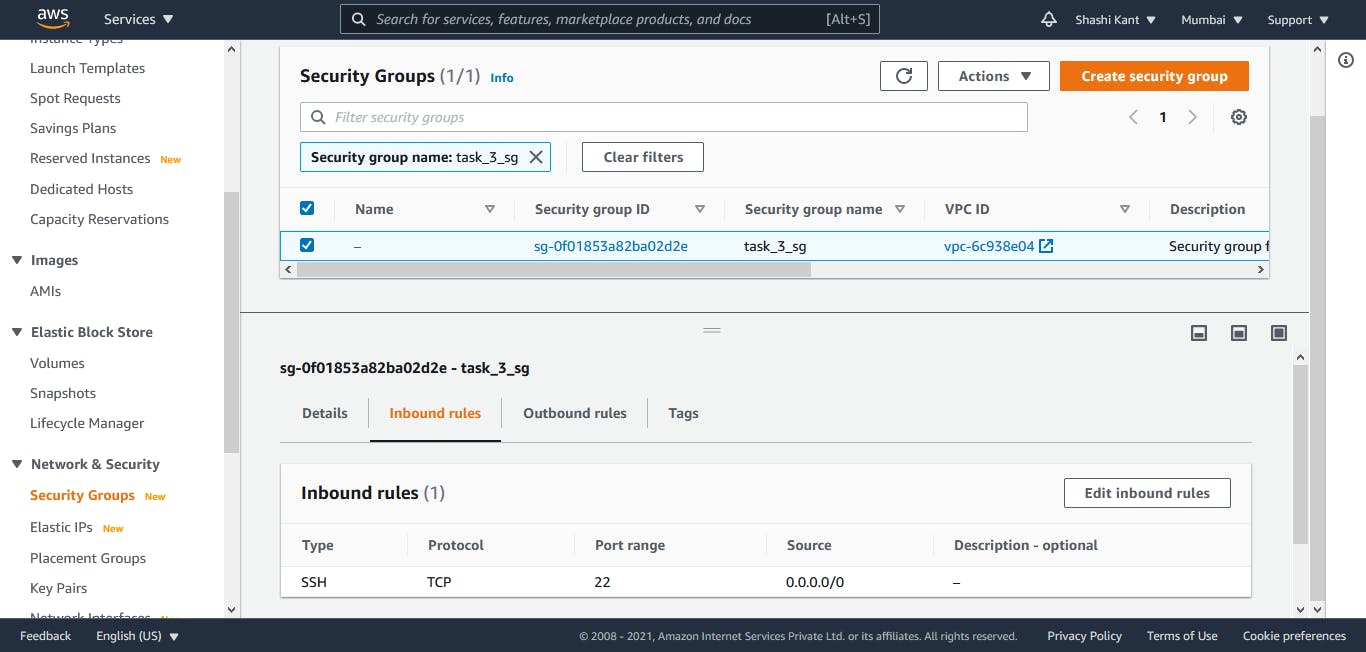
Security Group created successfully
Launch EC2 Instance
Now, our key and security group is created successfully, let’s use them and launch an instance on AWS.
aws ec2 run-instance --image-id <image_id(ami)> --instance-type <instance_type> --key-name <key_name> --security-group-ids <security_group_id> --count <count>
aws ec2 run-instances --image-id ami-068d43a544160b7ef --instance-type t2.micro --key-name task3 --security-group-ids sg-0f01853a82ba02d2e --count 1
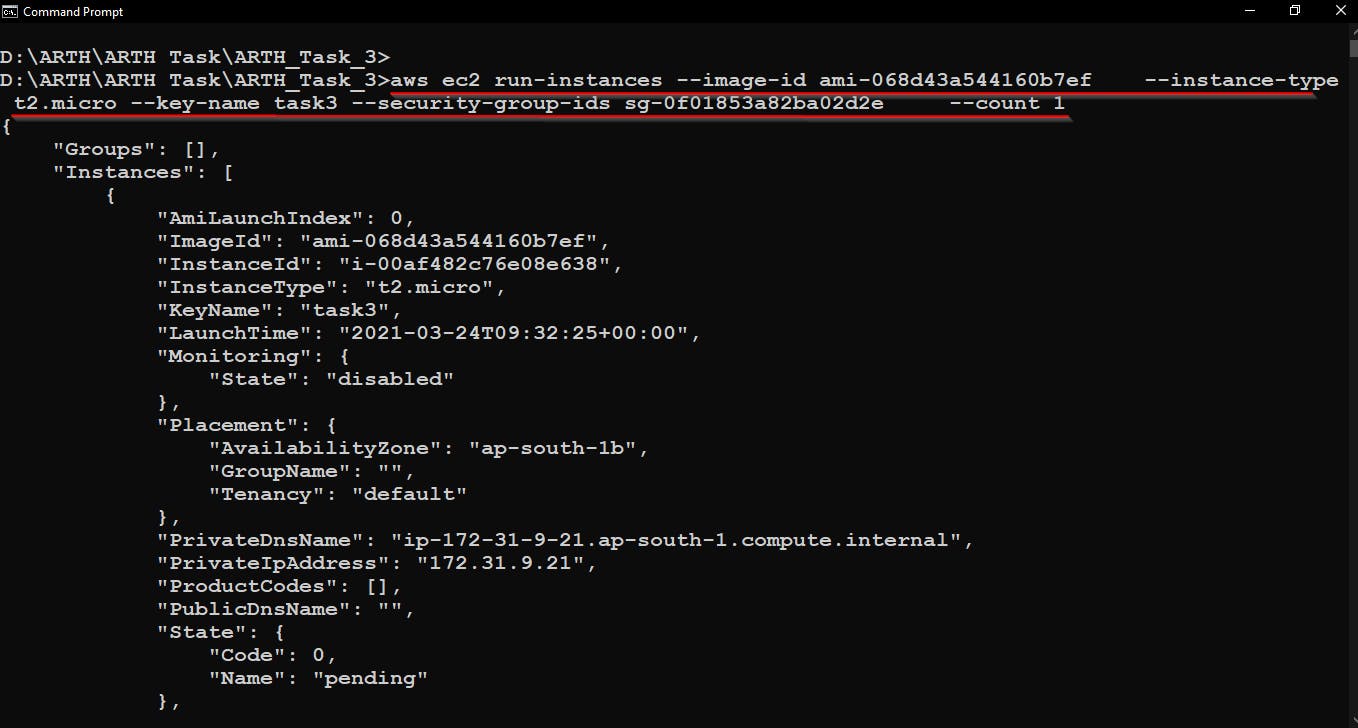
Launching EC2 instance
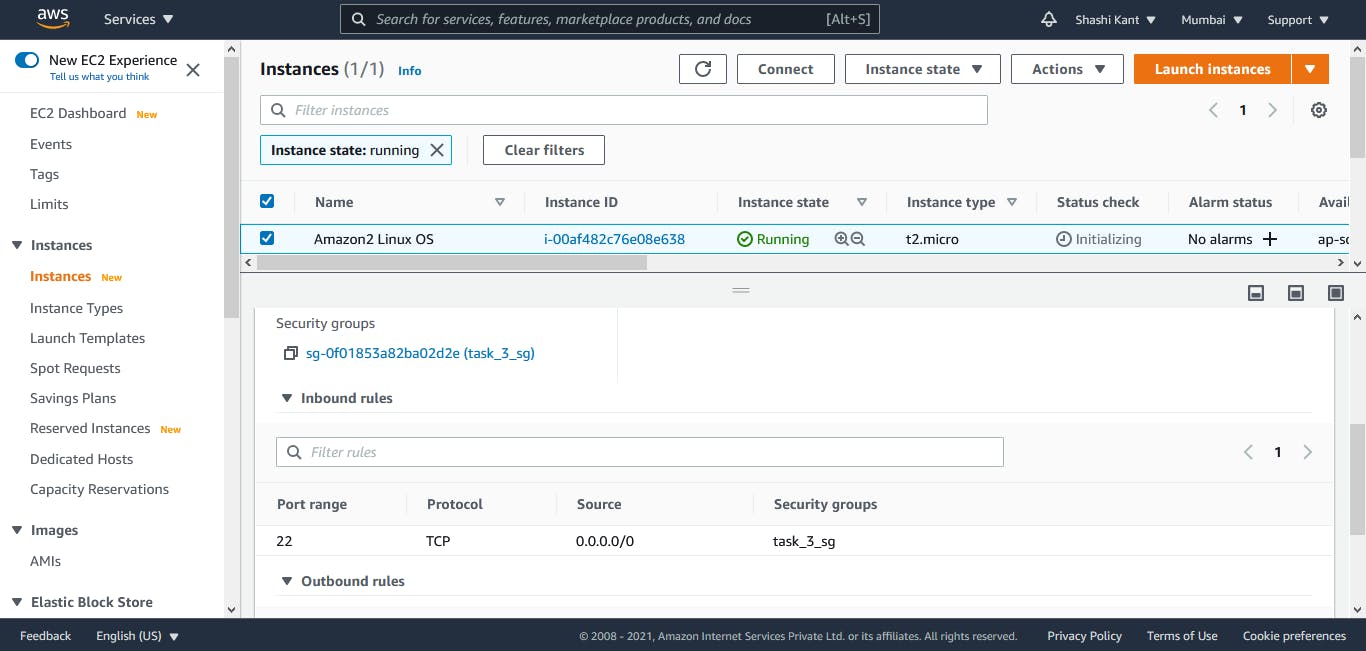
Instance Launched Successfully
Create EBS volume
Now we have to create an EBS (Elastic Block Store) volume of size 1GB and attach it to the EC2 instance.
Elastic Block Storage EBS is easy to use, high-performance block storage service designed to be used with Elastic Compute Cloud EC2 for both throughput and transaction-intensive workloads at any scale.
- Here we have to provide the same availability zone in which your instance is launched otherwise we will be not able to attach the volume with the instance
aws ec2 create-volume --availability-zone ap-south-1b --volume-type gp2 --size 1 --tag-specifications ResourceType=volume,Tags=[{Key=Name,Value=EBS_for_task_3}]
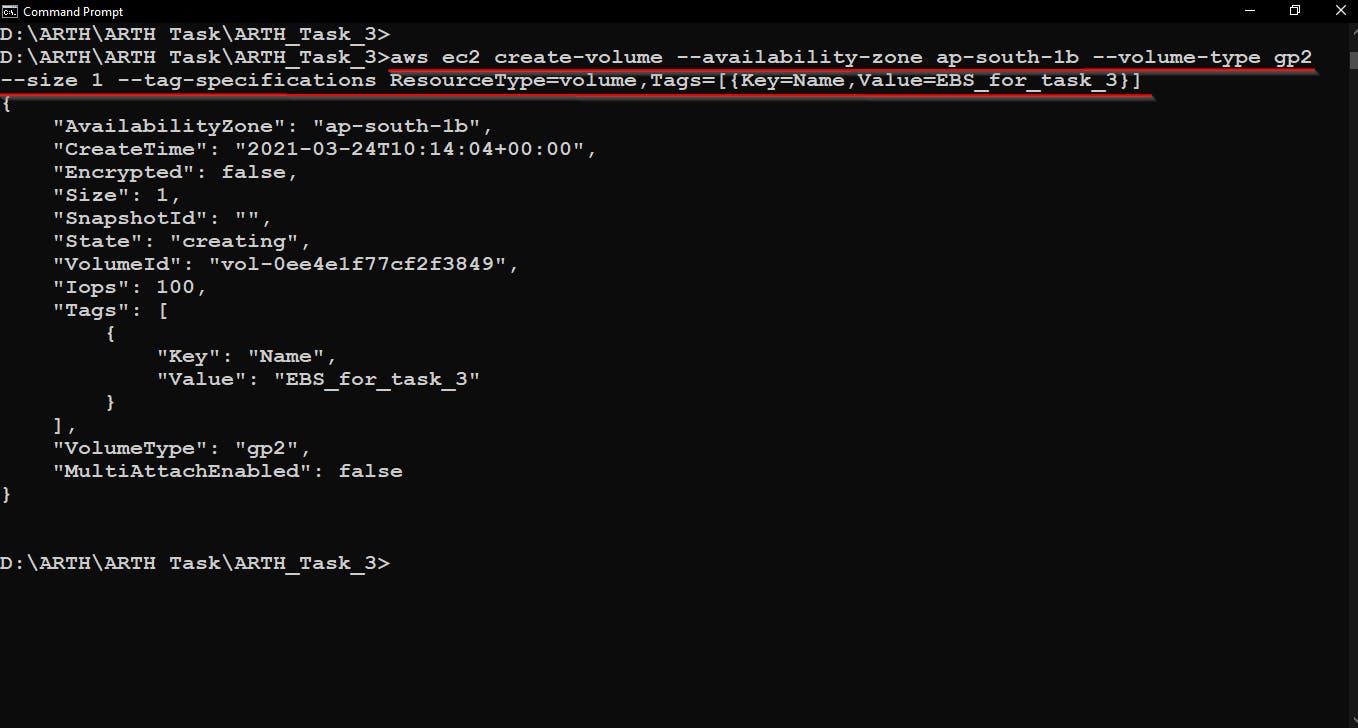
creating EBS volume
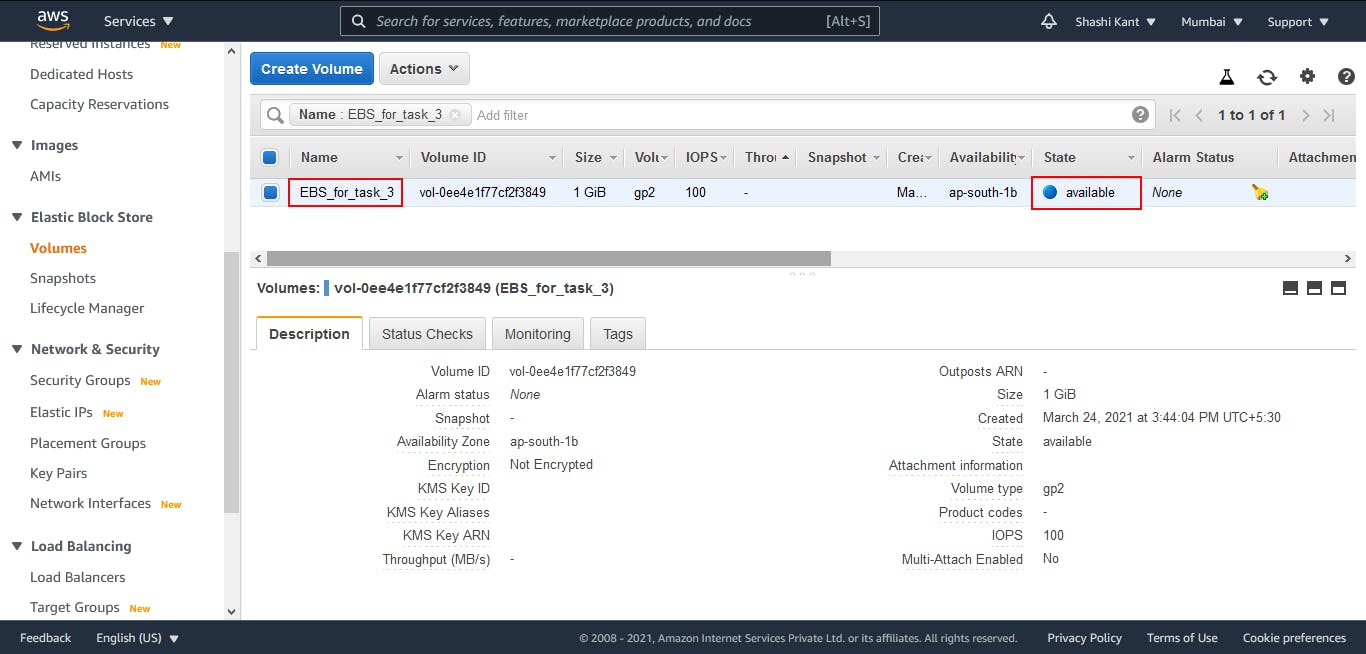
EBS volume created successfully…but it is not attached to any instance yet i.e. why it is showing state="available"
Attach EBS Volume to Instance
Now we have to attach this volume to the instance which we created above.
aws ec2 attach-volume --device /dev/sdb --instance-id i-00af482c76e08e638 --volume-id vol-0ee4e1f77cf2f3849
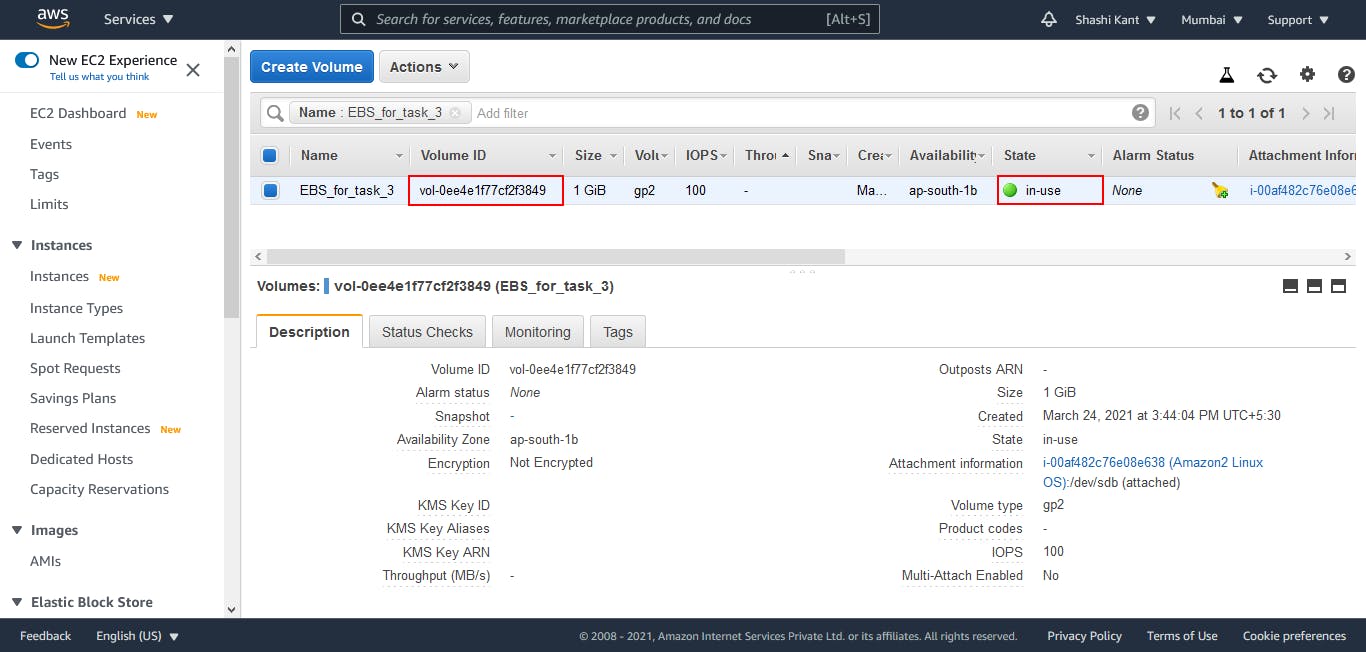
EBS volume is attached to the instance…we can see in “Attachment information”.
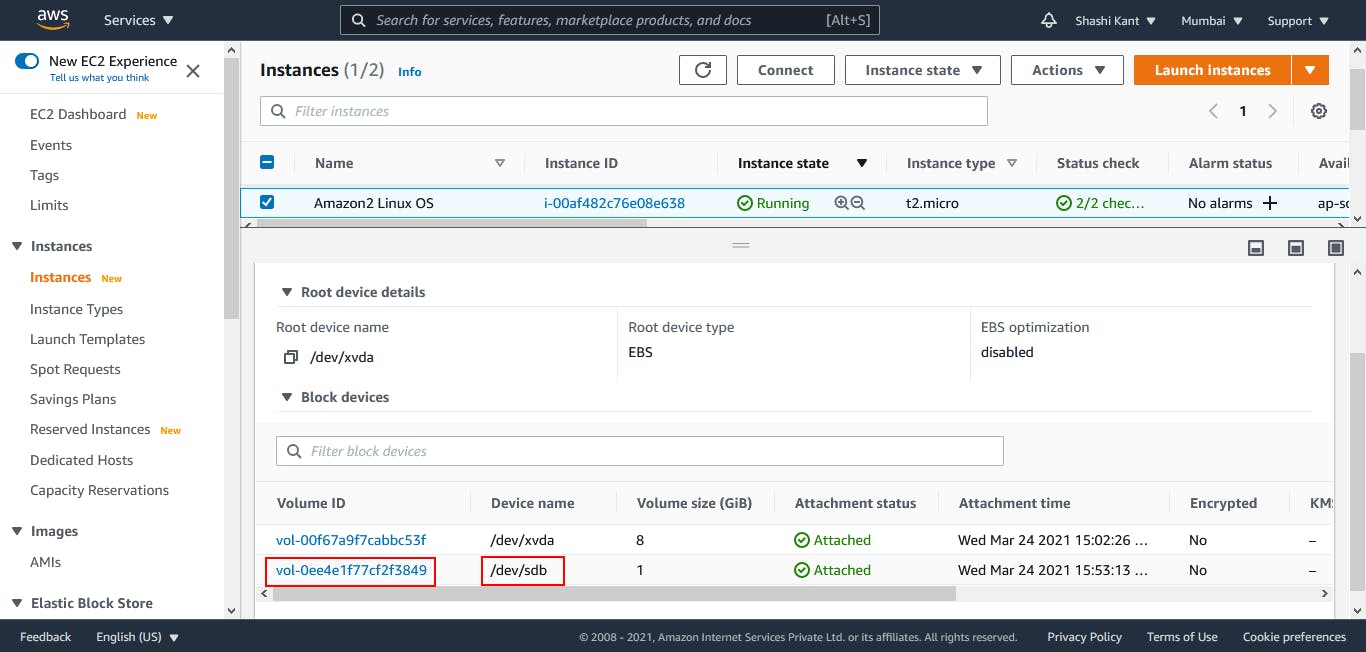
Here we can see our newly created volume of 1 GB is attached to Instance
And thus, all the objectives of the task are successfully completed.
That’s All, Keep Learning.
! THANK YOU For Reading !
